Configuring M365 for EncryptTitan
To use EncryptTitan email encryption services with M365, you must configure M365 to send outbound email through the EncryptTitan encryption gateway. Once configured, EncryptTitan will inspect each message to determine whether to encrypt the message based on your organizational encryption triggers.
Each of the main steps to configure EncryptTitan for M365 are listed below, followed by more specific substeps.
Add an EncryptTitan Connector.
Log in to Microsoft Online, and enter your administrator email address and password.
Note
If you are not an administrator, you will be redirected to the user hub. Contact your O365 Administrator if you need administrator access.
Select Sign in.
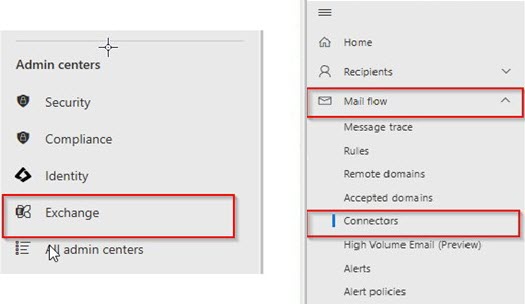
In the left area of the O365 console, select Admin to go to the O365 Admin Center.
Select Exchange > Mail Flow > Connectors.
In the Connectors section, select the + sign to add a new connector. The Mail Flow Scenario dialog box opens.
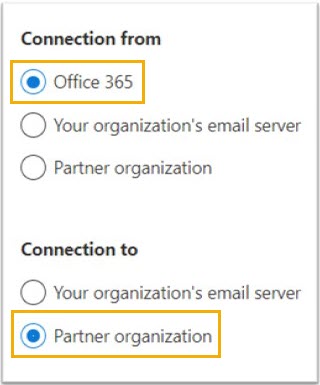
In Connection From, select Office 365 and in Connection to, select Partner organization. Select Next.
In the Name field, enter a descriptive name for the outbound connector; for example, EncryptTitan.
In the Description field, enter additional information about the outbound connector. To enable the connector immediately upon completion, select Turn it on. Select Next.
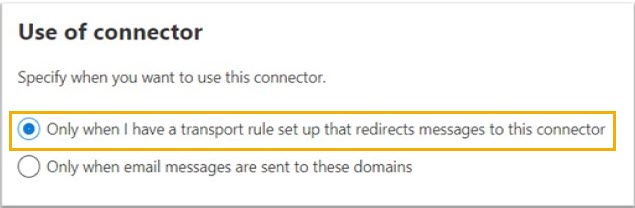
In the Use of Connector dialog box, select the option Only when I have a transport rule set up that redirects messages to this connector. Select Next.
On the Route email messages page, select Route email through these smart hosts.

Go to your EncryptTitan admin portal to get your SmartHost:
Select Configurations > Domain Setup and select the checkbox for your domain.
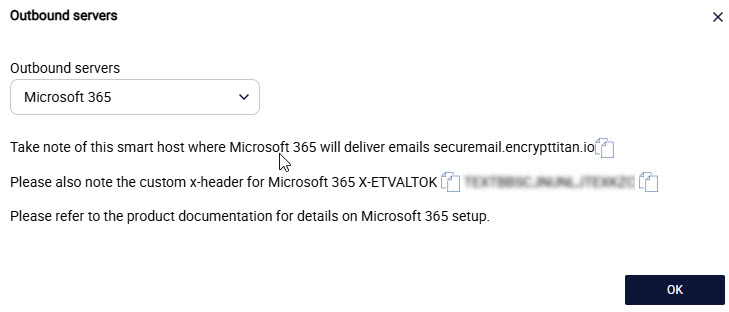
Select Outbound servers.
In the pop-up window, select Microsoft 365 from the dropdown menu and take note of the Smart Host where O365 will deliver emails (securemail.encrypttitan.io).
Enter your Smart Host in the text field and click the + sign to add the Smart Host.
Select Next.
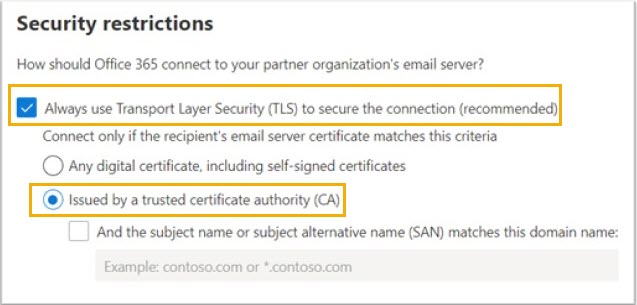
Ensure that Always use Transport Layer Security (TLS) and Issued by a trusted certificate authority (CA) are selected. Select Next.
Verify the connector by entering a test email address. This can be any email outside the domain you are setting up. Select the + sign, and then select Validate.
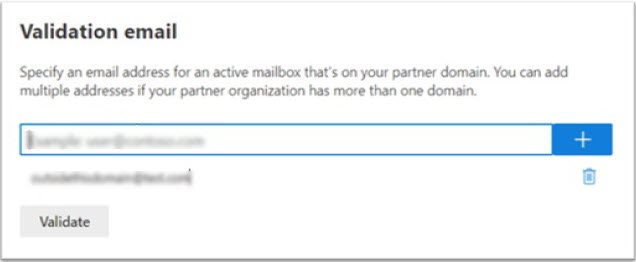
The validation step will attempt a connection from Office 365 to the EncryptTitan Gateway and email the designated email address. Both validation results should be successful. Select Next.
Select Create connector.
Add an EncryptTitan Token Header.
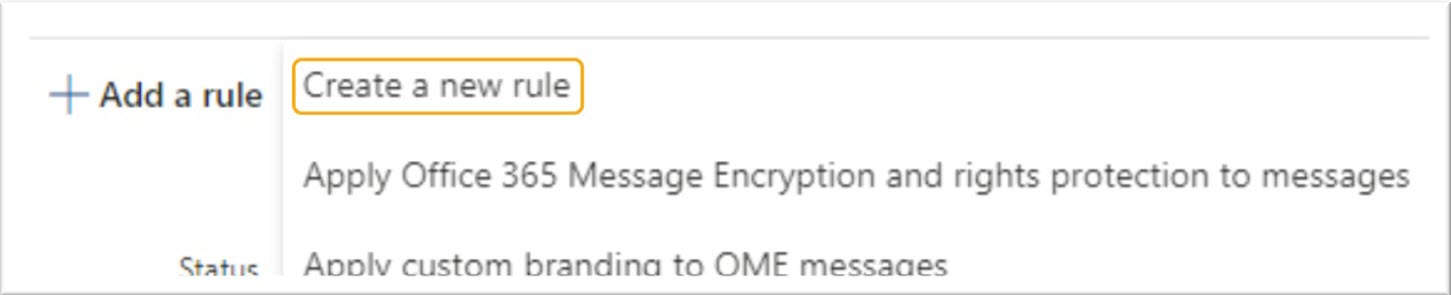
Go to Mail Flow and select Rules.
Select the plus + sign beside Add a rule, and select Create a new rule from the dropdown menu.
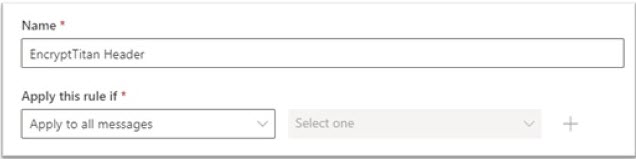
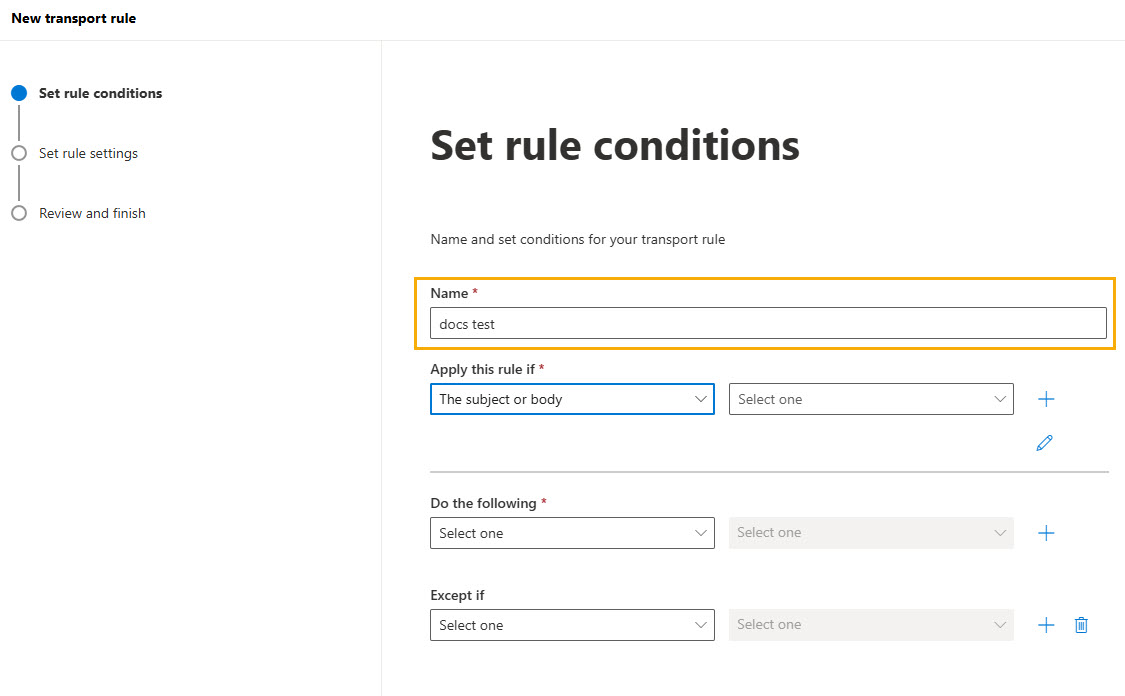
Enter a name for the rule you are creating, and from the Apply this rule if dropdown menu, select Apply to all messages.
From the Do the following dropdown menu, select Modify the message properties and in the dropdown menu beside it, select set a message header.
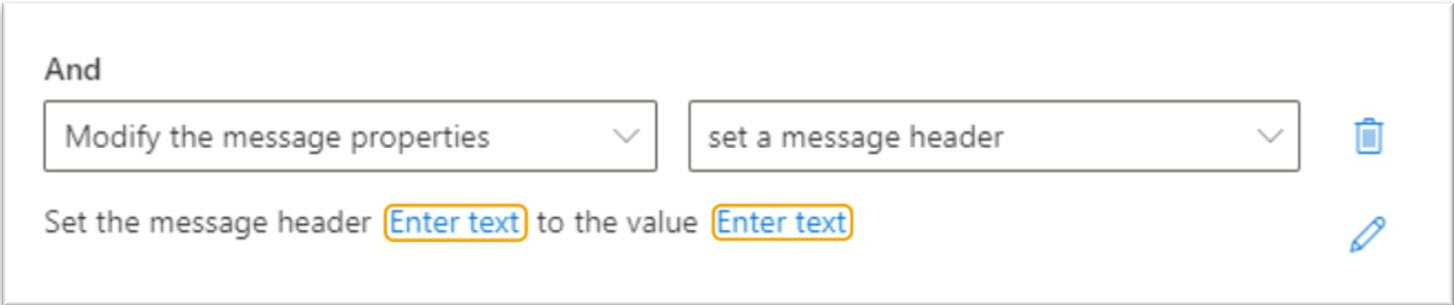
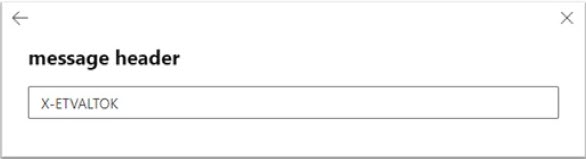
Select the Enter text... link beside message header, and enter X-ETVALTOK. Select Save.
Select the Enter text... link beside value, and retrieve the value for your account in the EncryptTitan portal. Go to Configurations > Domain setup and select the domain you are setting up. Select Outbound servers and in the window that appears, copy the custom x-header value by clicking the copy
 icon. Paste this value, which is typically 20 characters, into the message header text field and select Save.
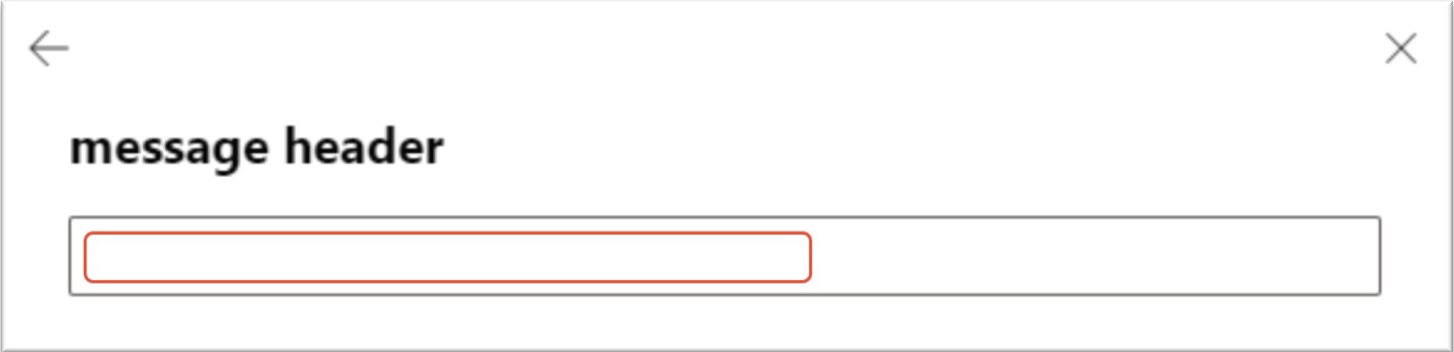
Select Next. If Next is greyed out, review your selections rule conditions to ensure they are correct.
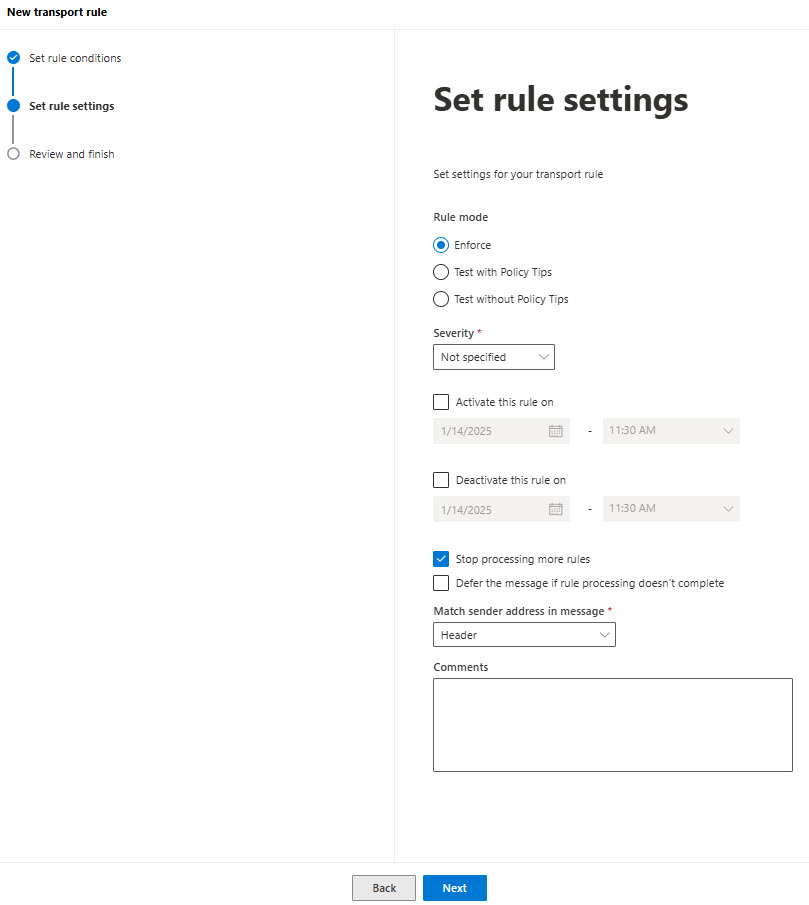
Under Rule mode, leave the default Enforce selected. Other available options would typically be left unchanged from the default settings.
Select Next to review the rule. Then select Finish > Done.
Add EncryptTitan Keyword Trigger.
Go to Mail Flow and select Rules.
Select the plus + sign beside Add a rule and select Create a new rule from the dropdown menu. Enter a name for the rule.
Select The subject or body and then select subject includes any of these words. Enter the keywords that you configured in the EncryptTitan Access Management Portal (https://access.encrypttitan.io) and select Save.

Note
Note: keywords are case-insensitive.
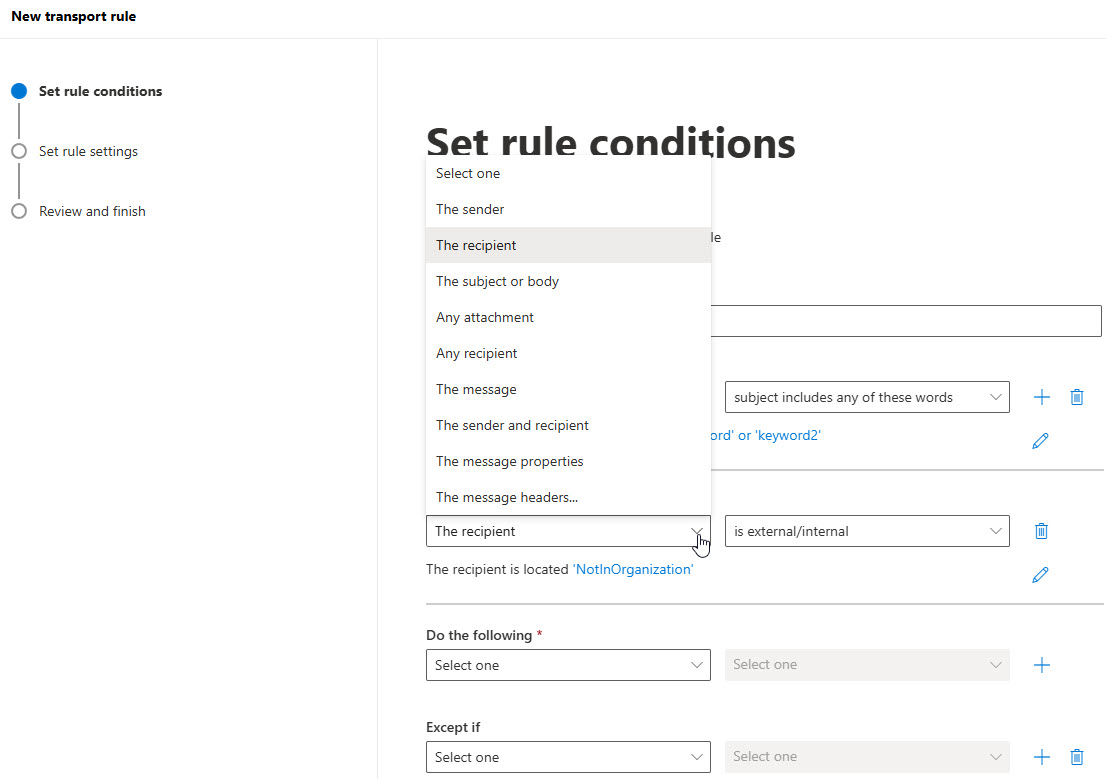
Add another action by pressing the + sign in the rule you just created. This will create a new And conditional dropdown selection.
In the newly created dropdown menu, select The recipient. Next, select is external/internal, then Outside the organization and Save.
Go to the Do the following section, and from the Do the following dropdown menu, select Redirect the message to and then select the following connector. This is the connector you set up in Step 1.
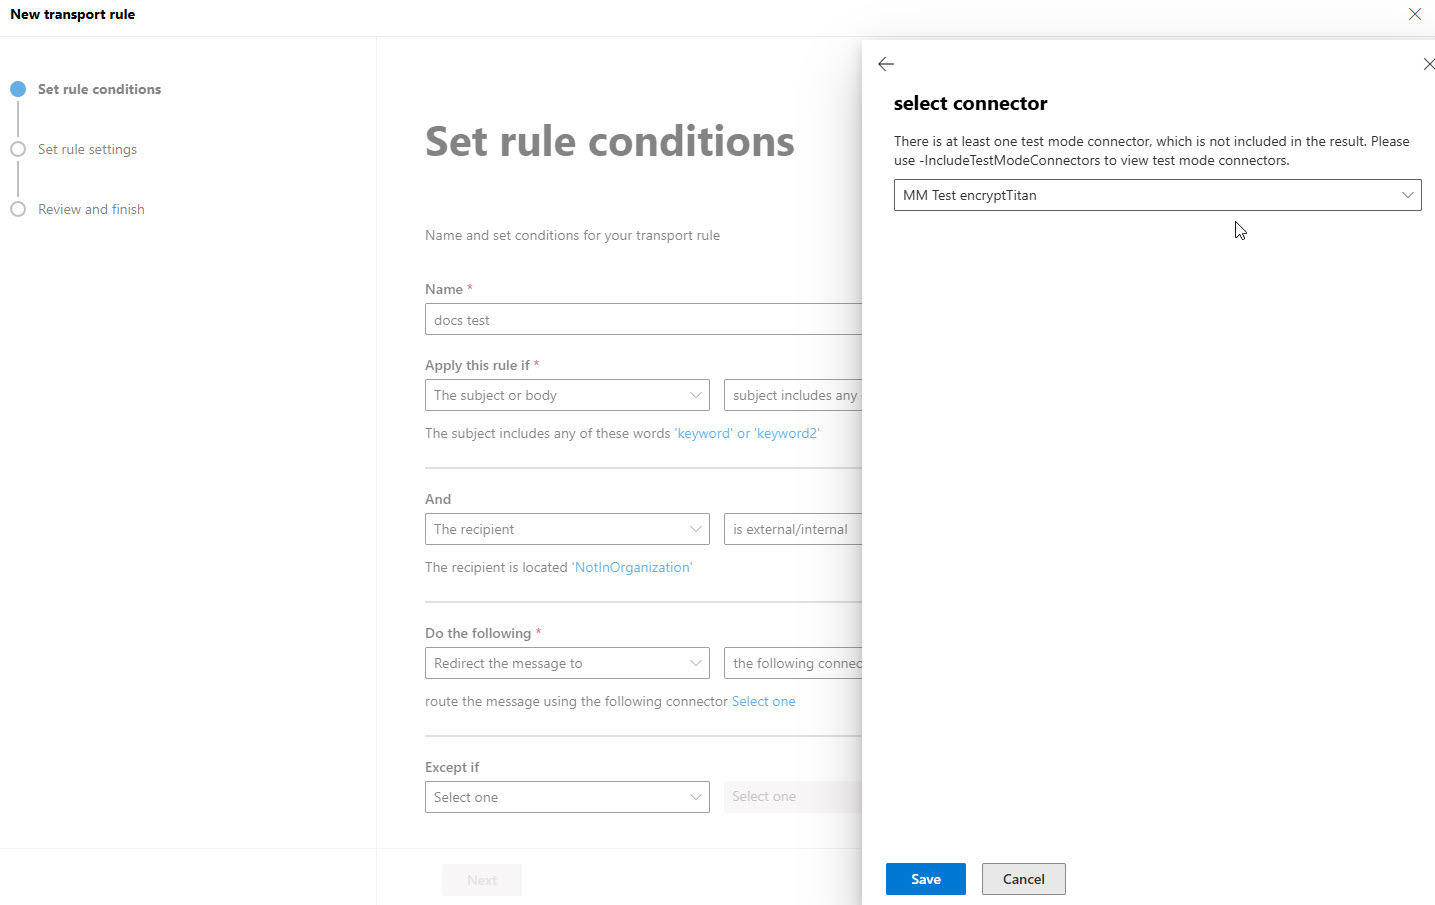
Select the Select one link and choose the connector that you just created for EncryptTitan. Select Save.
Select Next. If Next is greyed out, review your selections rule conditions to ensure they are correct.
Under Rule mode, leave the default Enforce selected.
Select the Stop processing more rules checkbox. Other available options are typically left unchanged from the default settings.
Select Next to review the rule. When you're finished, select Finish > Done.
Note
Note that mail rules are disabled when created.
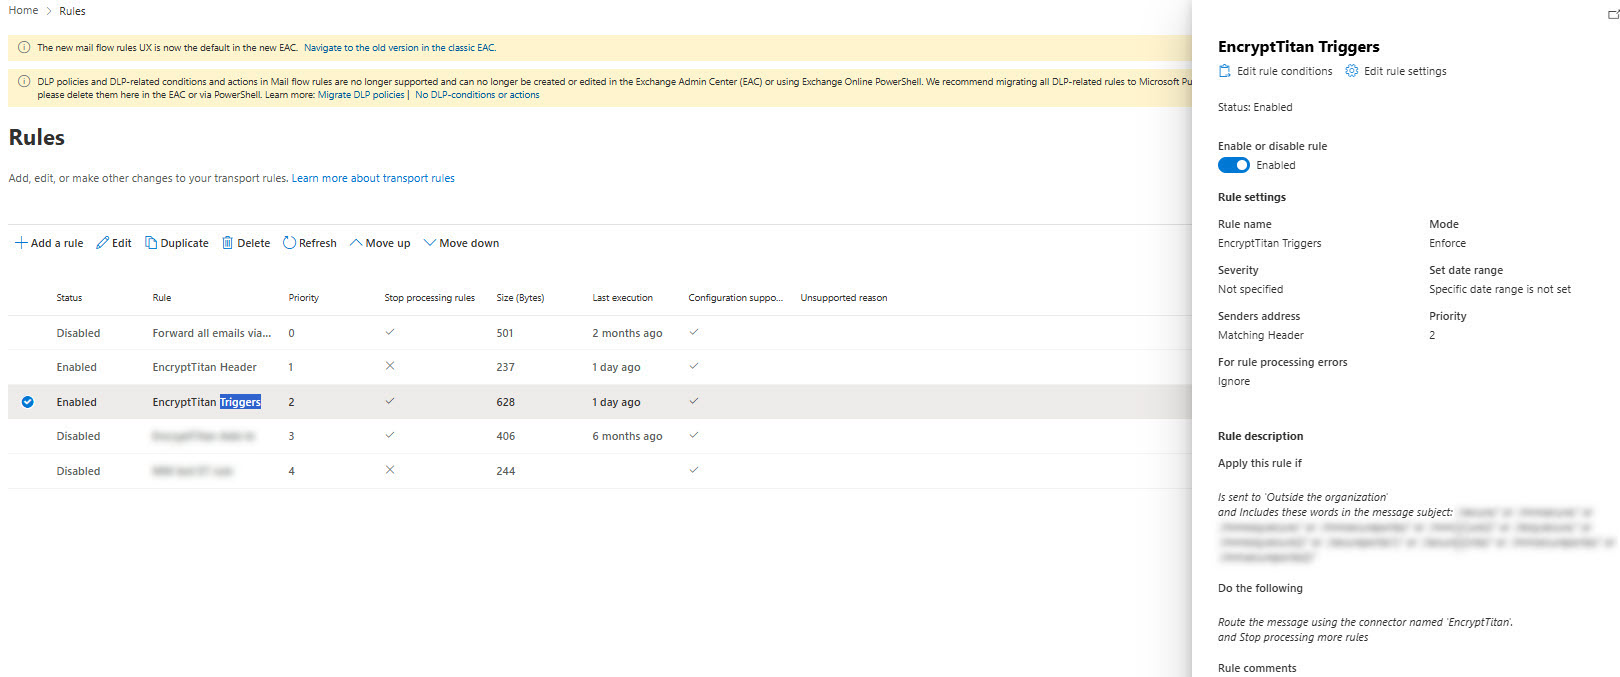
Click on each new EncryptTitan rule that you created and select enabled or disabled rule to enable the rule.
Note
The token header rule you created in Step 2 should be a higher priority than the keyword rule. Ensure that the token header rule has a higher priority in your list of rules.
You have now completed the configuration for the EncryptTitan service for the O365 platform. Note that changes normally take effect within five minutes.