Configuring SpamTitan for EncryptTitan
The following setup is specifically for customers who have a dedicated SpamTitan Infrastructure. If you are a SpamTitan customer on TitanHQ's SAS platform and SpamTitan is handling your outbound mail, please contact support for setup assistance.
Note
Before configuring SpamTitan to work with EncryptTitan, please ensure that your SpamTitan instance has been added to the EncryptTitan system to allow EncryptTitan to accept mail from your SpamTitan instance. This can be validated by contacting TitanHQ support.
If SpamTitan is not added to your EncyptTitan system prior to setup, then you may experience email delivery issues.
If you're using SpamTitan for your outbound mail and you want to use EncryptTitan email encryption service, you'll need to follow the steps below. Configuration is required on both your SpamTitan instance and O365 environment to to allow EncryptTitan to accept mail from your SpamTitan instance.
Add a Connector from O365 to SpamTitan.
If you have not already set up a connector from O365 to SpamTitan, follow the steps below to route your email traffic from O365 to SpamTitan.
Log in to Microsoft Online, and enter your administrator email address and password.
Note
If you are not an administrator, you will be redirected to the user hub. Contact your O365 Administrator if you need administrator access.
Select Sign in.
In the left area of the O365 console, select Admin to go to the O365 Admin Center.
Select Exchange > Mail Flow > Connectors.

In the Connectors section, select the + sign to add a new connector. The Mail Flow Scenario dialog box opens.
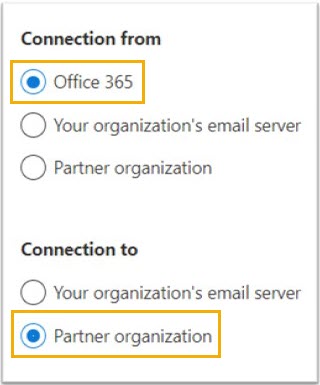
In Connection From, select Office 365 and in Connection to, select Partner organization. Select Next.
In the Name field, enter a descriptive name for the outbound connector; for example, EncryptTitan.
In the Description field, enter additional information about the outbound connector. To enable the connector immediately upon completion, select Turn it on. Select Next.
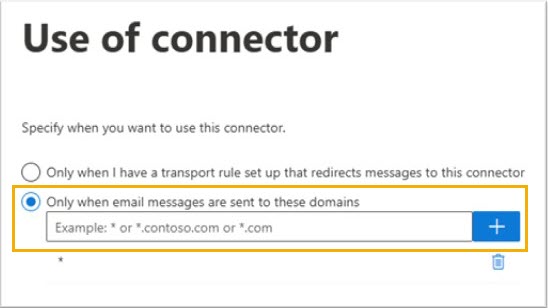
In the Use of Connector dialog box, select the option Only when email messages are sent to these domains. Enter * in the field and select +. Select Next.
On the Route email messages page, select Route email through these smart hosts.
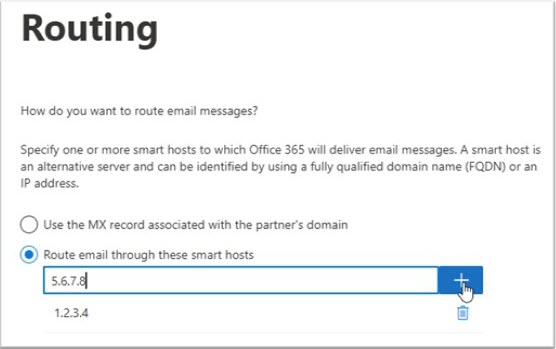
Enter the IPs of the SpamTitan Instances that will be used for Outbound mail. Enter each IP and select + to add. Then select Next.
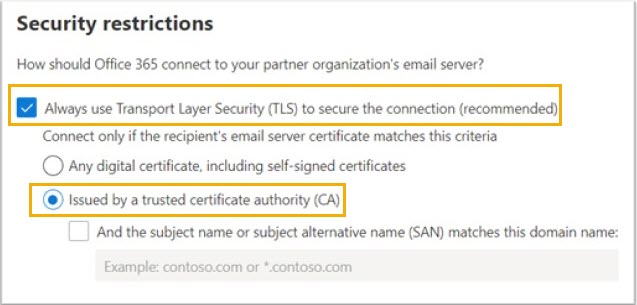
Ensure that Always use Transport Layer Security (TLS) and Issued by a trusted certificate authority (CA) are selected. Select Next.
Verify the connector by entering a test email address. This can be any email outside the domain you are setting up. Select the + sign, and then select Validate.
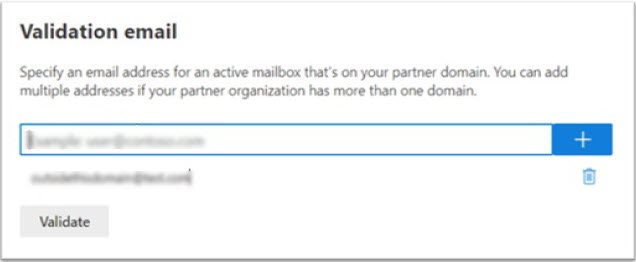
The validation step will attempt a connection from Office 365 to the EncryptTitan Gateway and email the designated email address. Both validation results should be successful. Select Next.
Select Create connector.
Add an O365 Rule for the EncryptTitan Token Header.
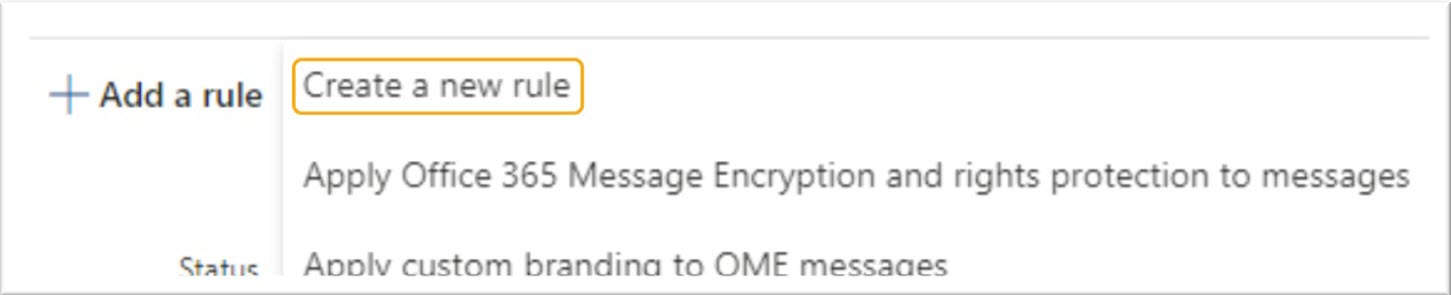
Go to Mail Flow and select Rules.
Select the plus + sign beside Add a rule, and select Create a new rule from the dropdown menu.
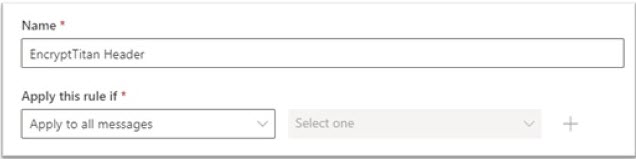
Enter a name for the rule you are creating, and from the Apply this rule if dropdown menu, select Apply to all messages.
From the Do the following dropdown menu, select Modify the message properties and in the dropdown menu beside it, select set a message header.
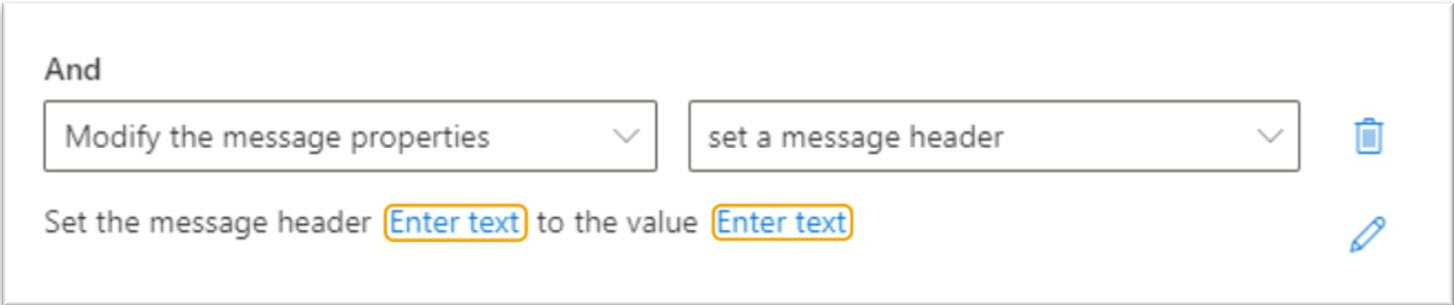
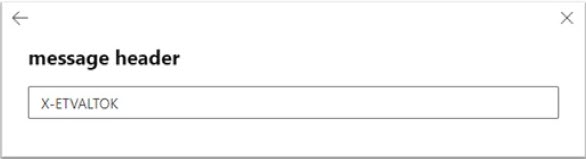
Select the Enter text... link beside message header, and enter X-ETVALTOK. Select Save.
Select the Enter text... link beside value, and retrieve the value for your account in the EncryptTitan portal. Go to Configurations > Domain setup and select the domain you are setting up. Select Outbound servers and in the window that appears, copy the custom x-header value by clicking the copy
 icon. Paste this value, which is typically 20 characters, into the message header text field and select Save.
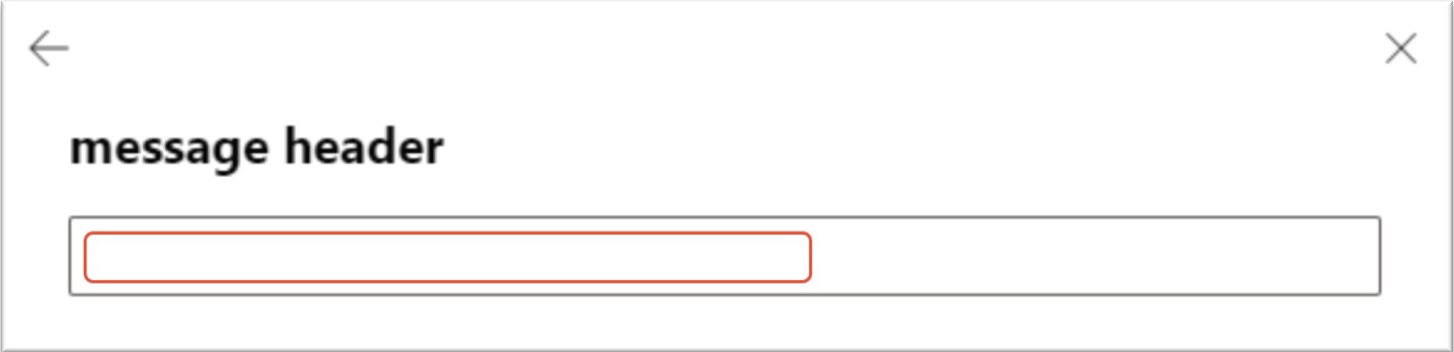
Select Next. If Next is greyed out, review your selections rule conditions to ensure they are correct.
Under Rule mode, leave the default Enforce selected. Other available options would typically be left unchanged from the default settings.
Select Next to review the rule. Then select Finish > Done.
Add to your Allowed Domains on SpamTitan.
You will need to add @encrypttitan.io to your allowed domains in SpamTitan to ensure inbound mail from EncryptTitan is not picked up as spam.
In SpamTitan, go to Filter Rules > Global Allow List to manage allow list entries. See Managing Global Allow Lists for assistance.
In the Allowed Domains section, select Add.

In the dialog box that opens, do the following:
Sender Domain: Enter @encrypttitan.io.
Include Subdomains: Leave enabled (by default).
Comment (optional): Add a short description.
Select Save.

Add a GreyList Exemption on SpamTitan.
To ensure mail from EncryptTitan is not greylisted, you'll need to add the EncryptTitan IPs to Greylist Exemptions.
In SpamTitan, go to System Setup > Mail Relay > Greylisting. See Greylisting Settings for assistance.
In the Sender IP Exemptions section, select Add.

In the dialog box that opens, do the following:
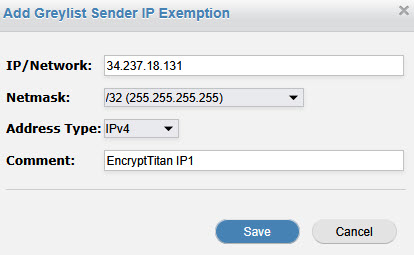
IP/Network: Enter 34.237.18.131.
Netmask: Select /32 (255.255.255.255).
Address Type (optional): Select IPv4.
Comment (optional): Add a short description.
Select Save.
Repeat the above steps for the following IPs, so that in total you'll add three entries.
52.87.122.63
54.161.105.105
Add an RBL IP Exception.
If you have the Realtime Blackhole Lists (RBLs) feature enabled on SpamTitan, we recommend adding the EncryptTitan IPs to Bypass RBL checks.
Go to System Setup > Mail Relay > IP Controls.
In the Bypass RBL checks section, select Add.
In the dialog box that opens, do the following:
IP/Network: Enter 34.237.18.131.
Netmask: Select /32 (255.255.255.255).
Address Type: Select IPv4.
Comment (optional): Add a short description.
Select Save.
Repeat the above steps for the following IPs, so that in total you'll add three entries.
52.87.122.63
54.161.105.105
Add SpamTitan Content Filter(s).
To enable emails containing EncryptTitan Keywords to be picked up for encryption, you'll need to add content filters to SpamTitan. You can add a content filter for each specific keyword you have set up on EncryptTitan, or you can create one single content filter for all the keywords you've set up on EncryptTitan. The following steps below are the same for both options, with the only exception being the regex code you enter in the Value field, which is explained below.
Note
This is a global change and will affect all customers on a multi-tenant gateway.
If you are setting up a specific content filter for each keyword which you have set up on the EncryptTitan Portal, you will need to repeat the steps below for each keyword.
To create a content filter for a either a single keyword or a content filter for multiple keywords, go to Content Filtering > Content Filtering and select Add.
In the dialog box that opens, do the following:
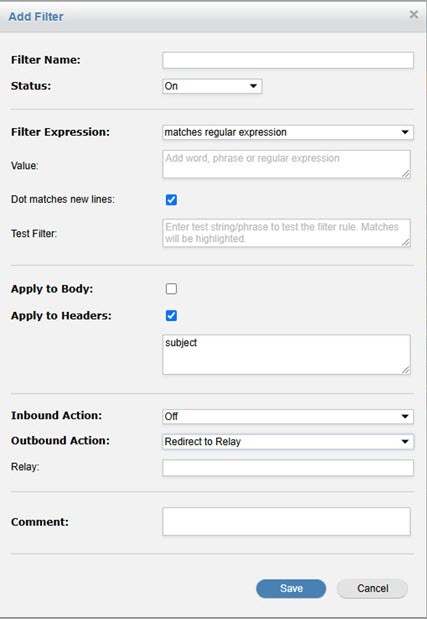
Filter Name: Enter the name of your content filter.
Status: Select On from the dropdown menu for the content filter to be active.
Filter Expression: Select matches regular expression from the dropdown menu.
Value: Note that the value you enter here differs depending on whether you want to create a single content filter for each keyword or a content filter for multiple keywords.
Content filter for single keyword: Copy the following regex code (?i)\/Secure\/($|.*) and paste it into the Value text box. The regex code specifies a case-insensitive keyword, where Secure is the keyword set up on your EncryptTitan Portal.
Content Filter for multiple keywords: Copy the following regex code (?i)\/(RegRequired1|NRR1|tls|nrr2|rr2)\/($|.*) and paste it into the Value text box. The regex code specifies a case-insensitive keyword, where RegRequired1, NRR1, tls, nrr2, rr2 are the keywords set up on your EncryptTitan Portal.
Dot matches new lines: Leave enabled (by default).
Test Filter:
Apply to Body: Leave unchecked (by default).
Apply to Headers: Select this checkbox, and enter the word subject in the content box.
Inbound Action: From the dropdown menu, select Off.
Outbound Action: Select Redirect to Relay from the dropdown menu.
Relay: Enter the smart host value found in your EncryptTitan Portal. Go to Domain Setup and select Outbound Servers. From the dropdown menu in the dialog box, select Microsoft 365. Copy the smart host value on the popup and paste in the Relay field.
Comment (optional): Enter a description to identify the filter.
Select Save.