Editing and Deleting User Policies
Editing a User Policy
Follow the steps below to edit a user policy.
User Policies are available at the domain level. Either:
Log in as a Domain Admin and go to Policies > User Policies, or
Log in as an MSP or Customer Admin and select a domain from the All Domains table at the Customer level. Go to Policies > User Policies.
Select the policy you want to edit from the User Policies table by selecting the edit
 icon under the Actions column:
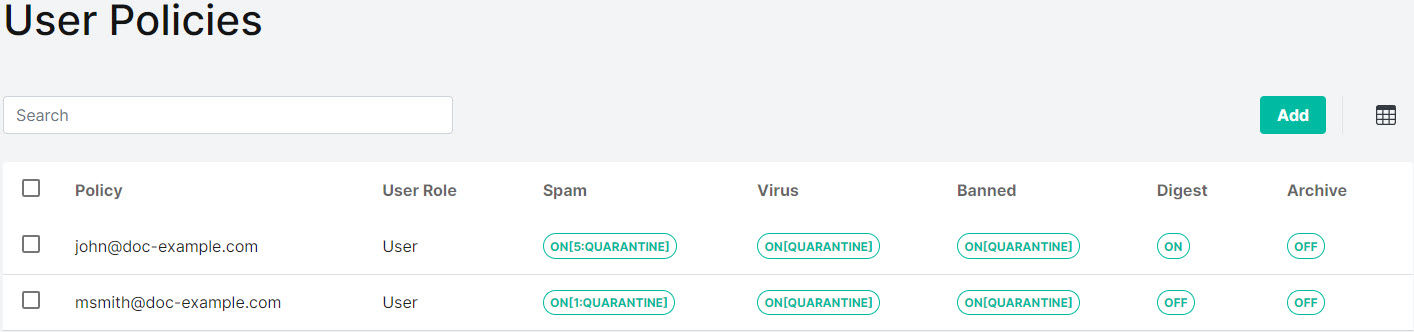
Make changes to the user policy using the setting descriptions here as a reference:
User Details: Edit a user's first or last name.
To help prevent spoofing by automatically running SpamTitan's ANTISPOOF_NAME and ANTISPOOF_NAME_FUZZY tests, enter a user's first and last name in these fields. Email from an external network with this name in the From: header (or a mild variation of the name) is more likely to be blocked as spam. For more information about anti-spoofing in SpamTitan, see Anti-Spoofing.
Spam Filtering: Specifies if spam filtering is enabled (ON) or disabled (OFF) for the selected user (default: ON).
Mark as Spam when score is greater than: This is the spam scoring threshold, above which mail is considered to be spam (default: 5).
Spam should be:
Quarantined
The message is accepted, but quarantined and appears in the user's quarantine reports. It can be released from quarantine if deemed to be a false positive.
Pass and Tag
The message is analyzed as normal and passed to the end recipient. Headers are added to allow filtering on the back-end.
Rejected
The message is rejected. The default action is to quarantine all messages that exceed the spam threshold. In the case of a banned attachment or spam, a DSN (delivery status notification) will be generated. No DSN will be generated for viruses, as most viruses originate from forged mail addresses.
Discard Spam scoring above: Messages scoring above this specified spam score are not quarantined.
Send NDR: If checked, a Delivery Status Notification (DSN) is generated if a mail is quarantined.
Important
DSNs can cause backscatter, which can result in a server IP being blocked.
Add X-Spam headers to non-spam mails: If enabled, additional headers are added to the message that indicates the result of the spam analysis. The following headers are added:
X-Spam-Status: Shows if a message exceeded the spam threshold and the score is achieved. The rules that were fired by the anti-spam engine are also listed.
X-Spam-Score: Shows the spam score achieved.
Classify marketing emails as spam: If this checkbox is enabled, then marketing emails are classified as spam with a score of 7.01. Depending on the value entered in the Mark as Spam when score is greater than field and the option selected in Spam should be field, the marketing emails will be quarantined, passed, or rejected. For example, if the overall spam threshold is set to 6 for emails to be quarantined, then marketing emails will be classified as spam and quarantined.
Modify Subject for spam emails: This checkbox is only visible if you selected Spam should be Pass and Tag. Select this checkbox if you want to modify the subject line of spam emails, which is possible in the Spam Subject Tag field.
Spam Subject Tag: This field becomes active if you selected the Modify Subject for spam emails checkbox. [**SPAM**] is the default and will appear in the subject line of spam emails. You can add a spam score to modify the filtering level on the back-end, for example, [**SPAM**] 3.
Virus Filtering: Specifies if virus filtering is enabled (ON) or disabled (OFF) for this user (default: ON).
Viruses should be:
Quarantined
The message is accepted, but quarantined and appears in the user's quarantine reports. It can be released from quarantine if deemed to be a false positive.
Pass and Tag
The message is analyzed as normal and passed to the end recipient. Headers are added to allow filtering on the back-end.
Rejected
The message is rejected. The default action is to quarantine all messages that exceed the spam threshold. In the case of a banned attachment or spam, a DSN (delivery status notification) will be generated. No DSN will be generated for viruses, as most viruses originate from forged mail addresses.
Sandbox: Specifies if sandboxing is enabled or disabled for this user (default: OFF).
Attachment Type Filtering: If enabled (ON), the corporate message attachment policy is applied to messages sent to this user (default: ON).
Banned Attachments should be:
Quarantined
The message is accepted, but quarantined and appears in the user's quarantine reports. It can be released from quarantine if deemed to be a false positive.
Pass and Tag
The message is analyzed as normal and passed to the end recipient. Headers are added to allow filtering on the back-end.
Rejected
The message is rejected. The default action is to quarantine all messages that exceed the spam threshold. In the case of a banned attachment or spam, a DSN (delivery status notification) will be generated. No DSN will be generated for viruses, as most viruses originate from forged mail addresses.
Quarantine Report: If enabled, a quarantine report is generated for this user when they have messages quarantined.
The Digest column in Policies > User Policies will list On or Off for a policy depending on how this setting is configured.
Language: Select the language you want reports to be written in.
Email report: Select the frequency with which quarantine reports will be sent. Reports may be generated daily (default), every week day, weekly, monthly or never.
Report contains: A quarantine report can contain a list of all items that are currently quarantined for each user or new quarantined items since the last report was generated (default). Both of these can be viewed with or without the virus-infected emails included.
Exclude spam mails scoring above: Spam that scores above a certain threshold (usually 5) is deemed spam. In quarantine reports, users generally want to view email that just scored just above the spam score threshold so they can look for any false positives.
Archive Mail: If enabled, all clean messages received by this user are stored in history.
Enforce 2FA: To enforce mandatory 2FA on a user, switch the toggle On. Turn it Off to make 2FA optional for that user. See 2FA for Users for further details.
Lock Policy: If enabled, any domain policy change will not affect this user policy. For example, if the domain policy for example.com changes the spam score to 1, any user under example.com will also see that change appear on their user policy unless it has been locked. See Locking and Unlocking User Policies for further details.
Note
A warning is given to an admin when editing a domain policy with locked users.
Select Save Changes to save the user policy settings.
Deleting a User Policy
To delete one or more user policies, select the checkbox(es) to the left of the user policy (or policies) and go to the Actions dropdown menu and select Delete Policy.