DMARC
DMARC (Domain-based Message Authentication, Reporting, and Conformance) is an email authentication protocol that helps to prevent unauthorized use of your domain. DMARC checks to ensure that the domain in the From: header aligns with the SPF and that the DKIM signature is authenticated to help prevent spoofing.
As an admin, you have the option to exclude IP/Networks from DMARC checks by adding them to the exempt IPs list. This can be useful so that legitimate traffic isn't blocked. This can happen, for example, if a sending domain does not have full DMARC alignment. Many organizations use marketing platforms or SaaS ticketing services to send on their behalf. If those providers don't sign the messages with DKIM aligned to the customer domain, strict DMARC will fail. Likewise, if they send messages using their own envelope domains, DMARC will fail. Similarly, forwarding emails invalidates SPF, and often DKIM, leading to DMARC failures and potential delivery issues.
Important
Ensure that that IP/Networks you exempt from DMARC checks are trusted IPs.
IP/Networks that have been excluded from DMARC checks can be found by going to Filtering > DMARC.

IP/Network: Unique address that an email originates from.
Last Modified: Date and time that the exempted IP/Network was last updated.
Comments: Optional text for the exempt IP/Network.
Actions: Select the edit
 icon to edit an IP/Network.
You can manage how the table is displayed as follows:
Use the Search
 box to search IP/Networks and Comments. Select the column icon
  to manage how table columns are displayed:
Select the toggle beside a column name to show or hide a column.
Use the reordering
 icon to move columns up and down the list. This changes the left-to-right display. An item at the top of the list, for example, means that it will be the first column on the left. Select Restore default order to restore the columns to their default positions.
Resize columns by hovering your cursor over the column boundary you want to adjust until it becomes a resize
 cursor. Drag the boundary until the column is the width you want.
Select the up/down
 arrows in the column headers to sort column content.
Adding IP/Networks
To exclude IP/Networks from DMARC checks, you can add them to the exempt IPs list by following the steps below:
Go to Filtering > DMARC.
You can add an IP/Network individually or upload a list of IPs/Networks in a .csv file.
To add an IP/Network individually:
Select Add and choose IP/Network.
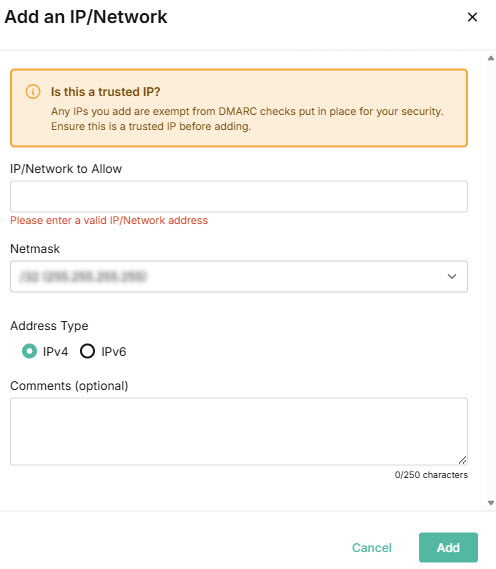
Complete the fields in the pop-up window:

IP/Network to Allow: Enter the IP/Network address to be exempt from DMARC checks.
Netmask: From the dropdown menu, select the netmask.
Address Type: Select the internet protocol version: IPv4 or IPv6.
Comments (optional): You can enter a reason for adding the IP/Network to the exempt IPs list.
Select Add.
To upload a list of IPs/Networks:
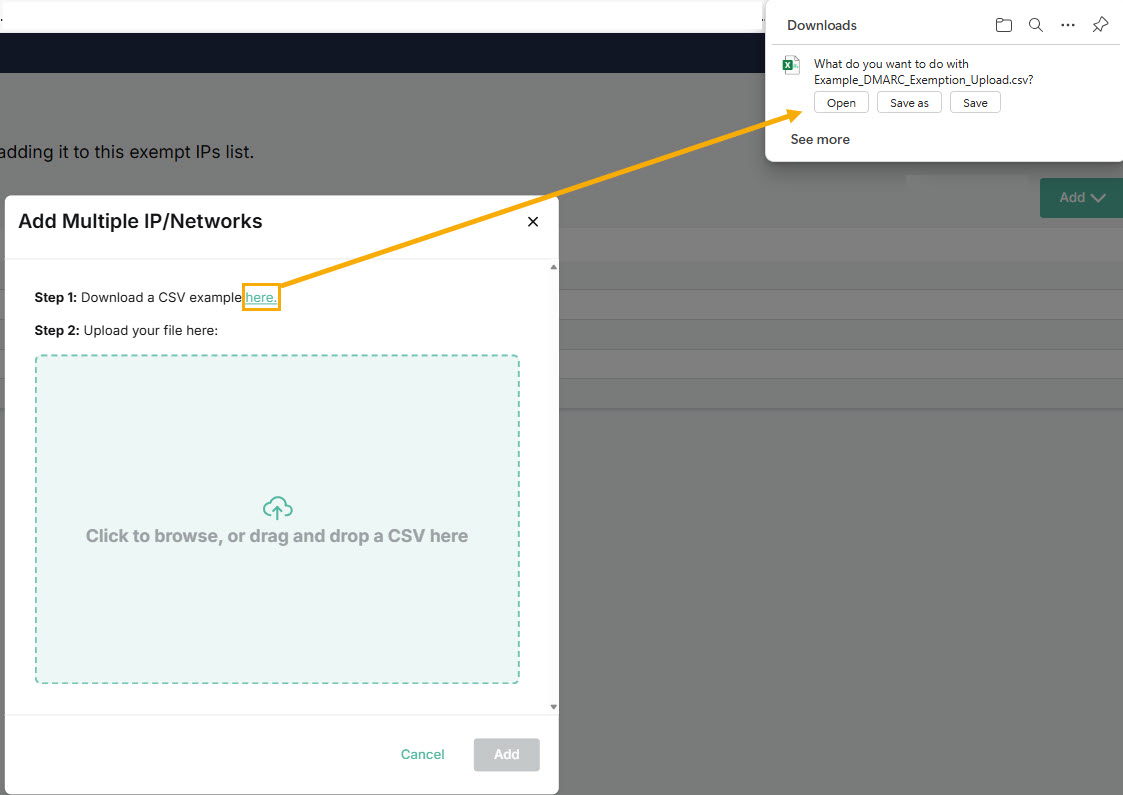
Select Add and choose Multiple IP/Networks.
In the pop-up window, drag and drop the csv file to be uploaded.
Note
You can download an example of a csv file, which you can populate with IP/Networks, by selecting here in the pop-up window.

Select Add.
Editing IP/Networks
To edit the IP/Networks, do the following:
Go to Filtering > DMARC, and select the edit
 icon for the IP/Network you want to edit.
In the pop-up window that opens, you can edit the following:
IP/Network to Allow: Enter the IP/Network address to be exempt from DMARC checks.
Netmask: From the dropdown menu, select the netmask.
Address Type: Select the internet protocol version: IPv4 or IPv6.
Comments (optional): You can enter a reason for adding the IP/Network to the exempt IPs list.
Select Save Changes.
Deleting IP/Networks
To delete IP/Networks from the list:
Go to Filtering > DMARC and select the IP/Network(s) that you want to delete.

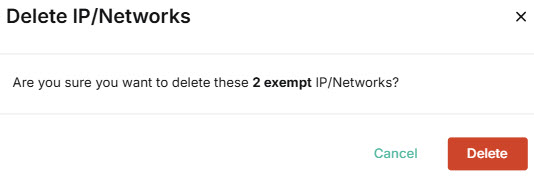
Select Delete. In the pop-up window that appears, select Delete again to confirm your decision.
