Installing EncryptTitan Outlook Add-In Locally
The EncryptTitan Outlook Add-In allows users to send secure emails easily from their Outlook client. Follow the steps below to install the add-in directly on a local machine.
Important
If you are already using EncryptTitan and have a Managed Email Security license, additional configuration is required on your email server for the EncryptTitan Outlook Add-In to function.
Follow the link below for your particular mail server:
Microsoft 365: Step 4, Add the Outlook Add-In Header, in Configuring M365 for EncryptTitan.
Google Workspace: Steps 20-23 in Configuring Google Workspace for EncryptTitan.
SpamTitan: Step 7: Add SpamTitan Content filter for the EncryptTitan Outlook Add-in in Configuring SpamTitan for EncryptTitan.
If you have an Advanced Managed Email Security license, no additional configuration is required on your email server for the EncryptTitan Outlook Add-In to function.
First, you need to access and save the manifest.xml install file:
Open the manifest.xml file here.
When the manifest.xml file shows in your browser, click CTRL-S on your keyboard to save the file to your machine. You need to know what folder this install file saves to in later steps (default: Downloads folder).
Next, access the Add-Ins for Outlook dialog:
Open a web browser and log in to your Microsoft Outlook web client.
Select My add-ins from the side menu and scroll down to Custom Addins.
Select + Add a custom add-in and choose Add from File....
Select the manifest.xml file downloaded in Step 1 and select Open to install the add-in.
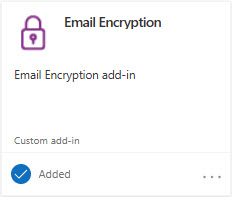
Select Install on the Warning pop-up and the installation will begin. The pop-up will close when the installation is complete and you will see the add-in:

Close the Add-Ins for Outlook dialog box.
Once installed, the add-in will be available in your Outlook client. See Opening the EncryptTitan Outlook Add-In in your Outlook Client.