Configuring Exchange On-Prem for Outlook Plug-In
Follow the steps below to configure Exchange On-Prem for the Outlook Plug-In. You'll need to first add an EncryptTitan connector and then add the mail flow rule in the Microsoft On-Prem Exchange to redirect the email to EncryptTitan.
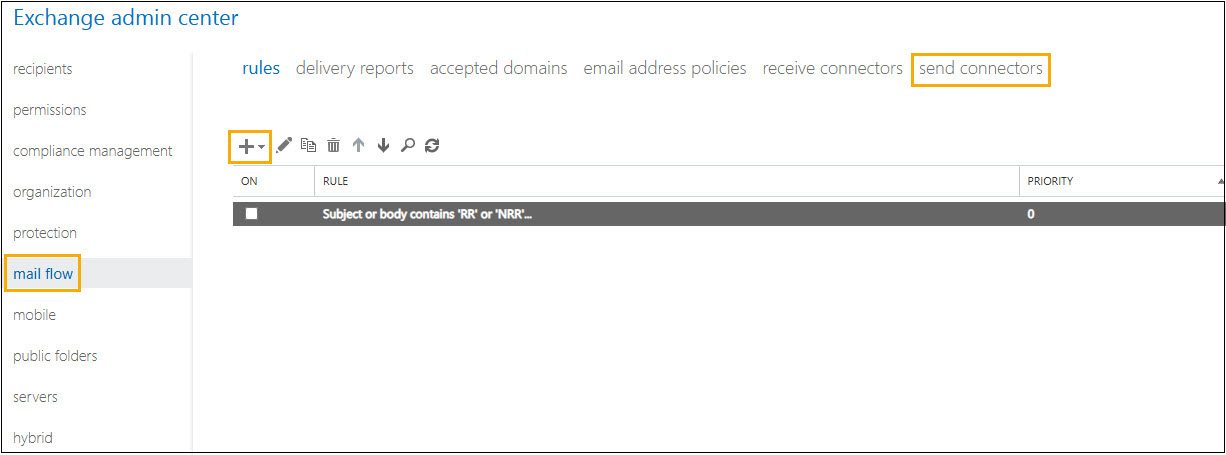
Add an EncryptTitan Connector.
Log in to the Exchange Admin Center.
Go to Mail Flow > Send Connectors > + Add.
Enter a name for your connector (for example, EncryptTitan Connector).
Select Custom (for example, to send mail to other non-Exchange servers).
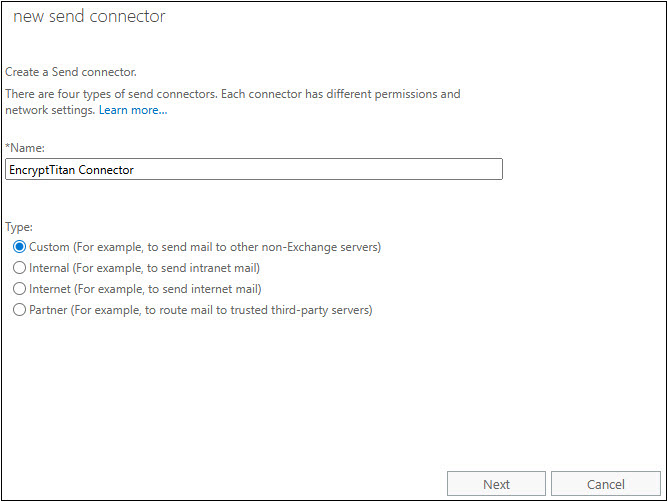
Select Next.
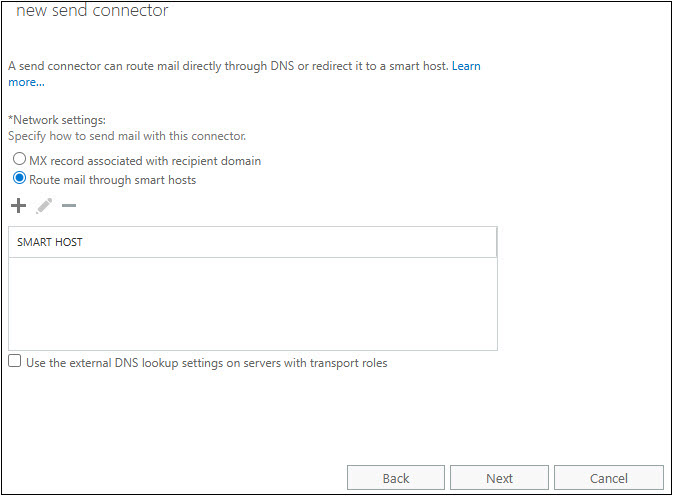
Choose Route mail through smart hosts.
Select + Add.
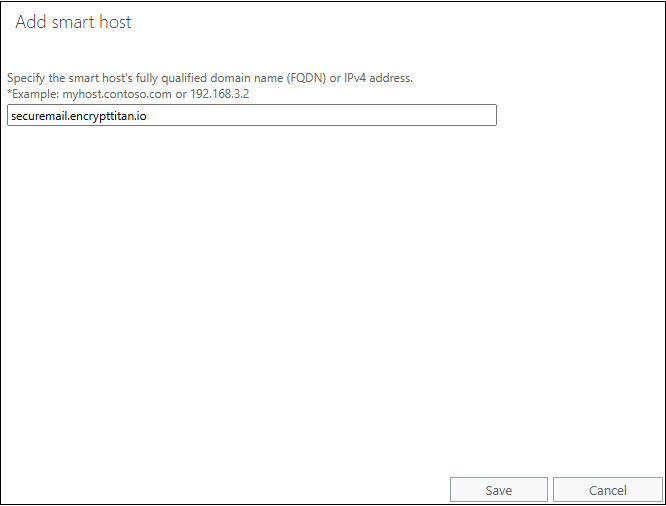
Enter the EncryptTitan smart host (that is, securemail.encrypttitan.io) and select Save.
Select Next.
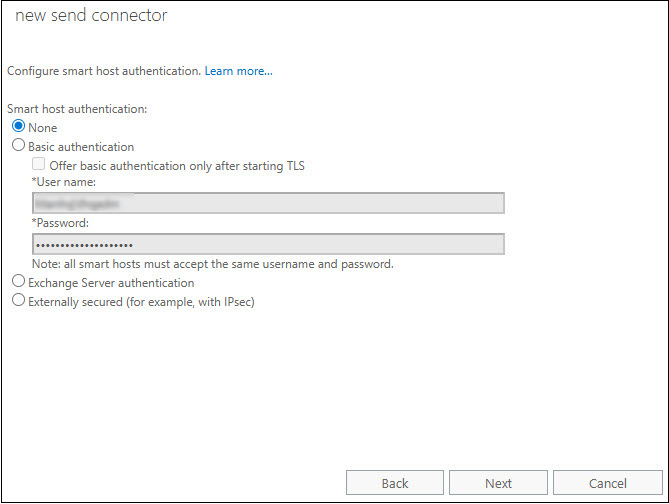
Choose how to authenticate with the smart host by selecting None or Basic Authentication). Select Next.
Select + Add, and set the following values:
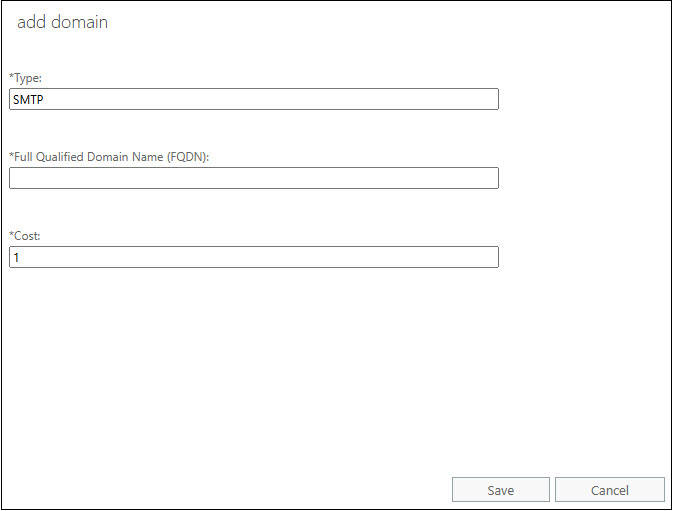
Type: SMTP
Full Qualified Domain Name (FQDN): * If you are setting up EncryptTitan for all of your domains, or else enter the specific domain you want to set up for EncryptTitan (for example, domainA1.com).
Cost: Use default value.
Select Save, and then select Next.
Select + under Source server, and in the window that opens, select your exchange server from the list of options and select add ->.
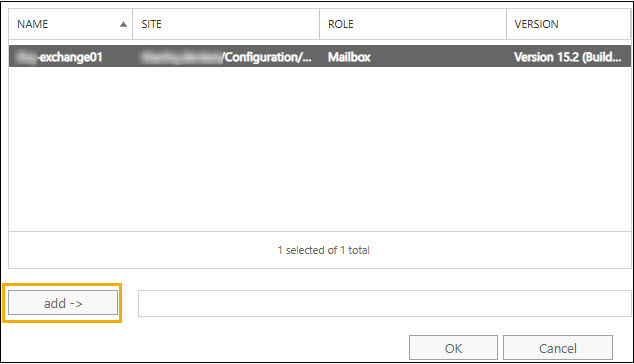
Select OK and then in the next window, select Finish.
Add the Mail Flow Rule.
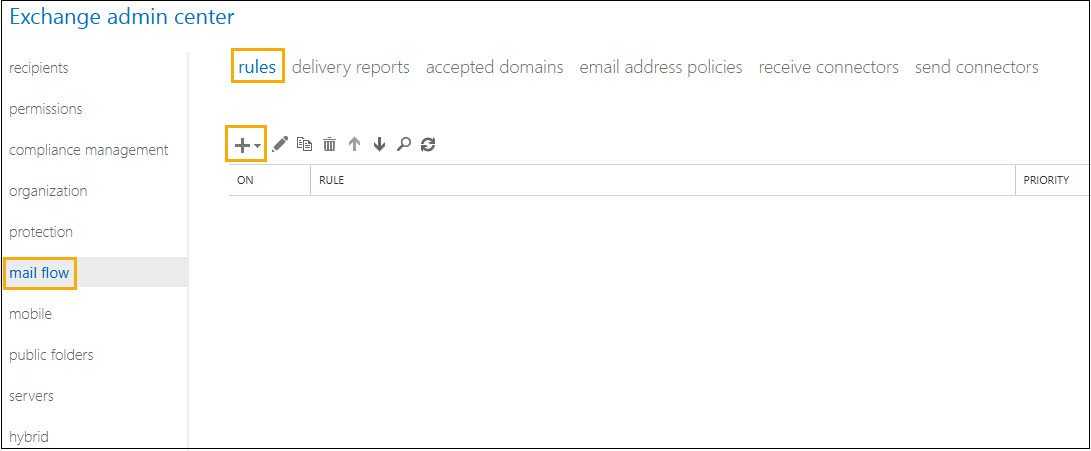
Log in to Exchange Admin Center.
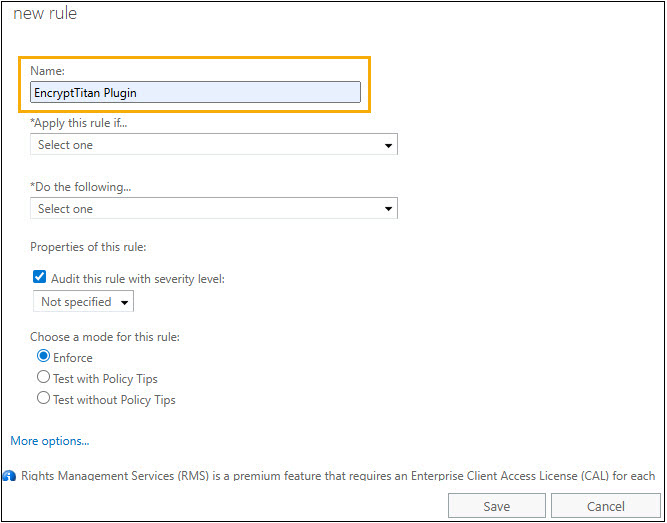
Go to Mail Flow > Rules, and select +Add.
In the dropdown menu, select Create a new rule, and in the window that opens, enter a name for it.
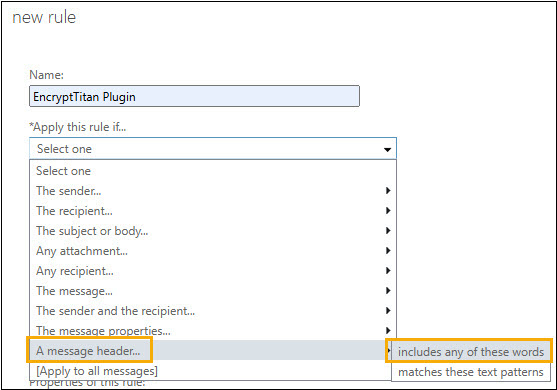
From the Apply this rule if dropdown menu, select A message header... > includes any of these words.
Note
If you do not see this option in the dropdown menu, select More Options in the lower left corner of the window.
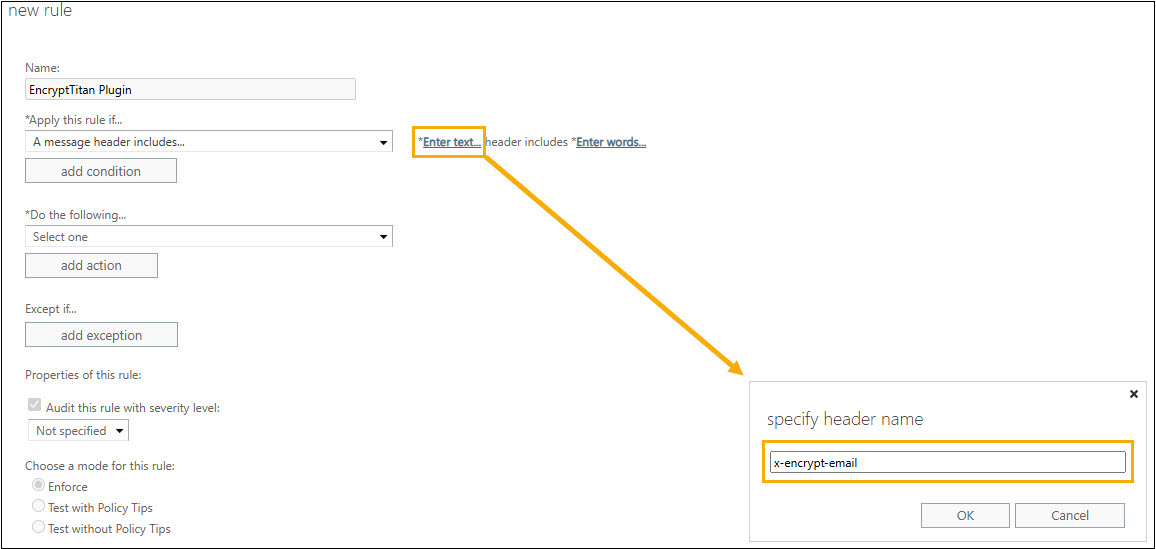
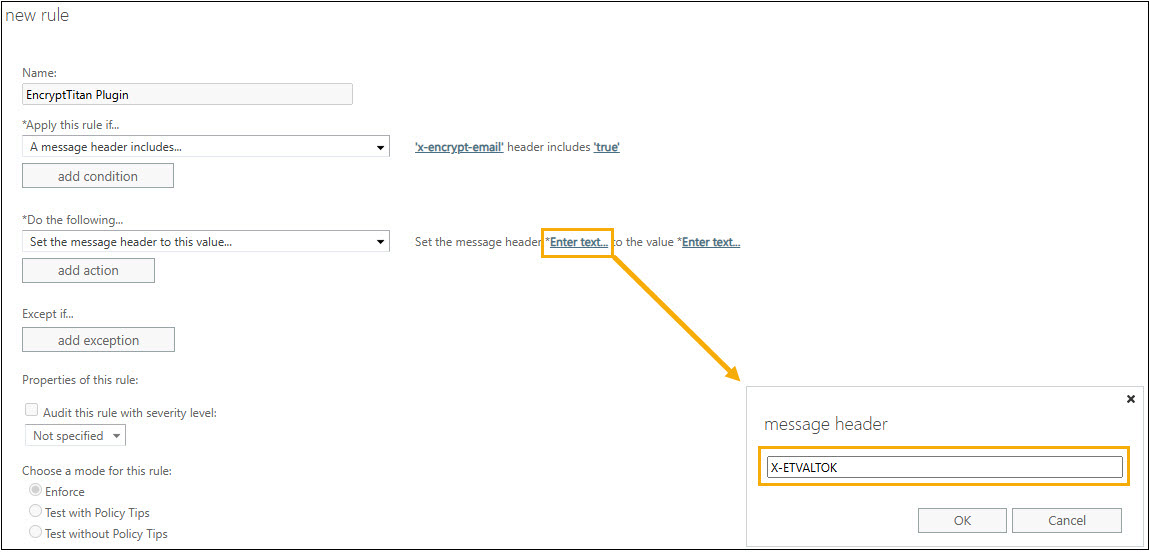
Select Enter text..., enter x-encrypt-email, and select OK.
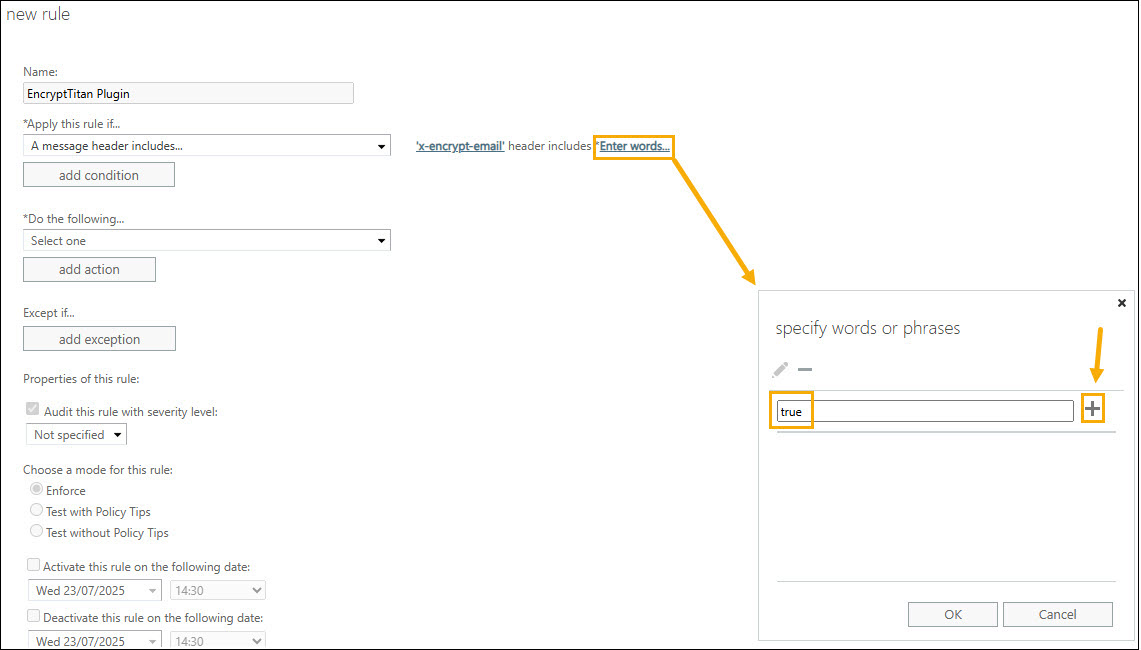
Select Enter words..., and enter true. Select +, and then OK.
From the Do the following dropdown menu, select Modify the message properties > Set a message header.
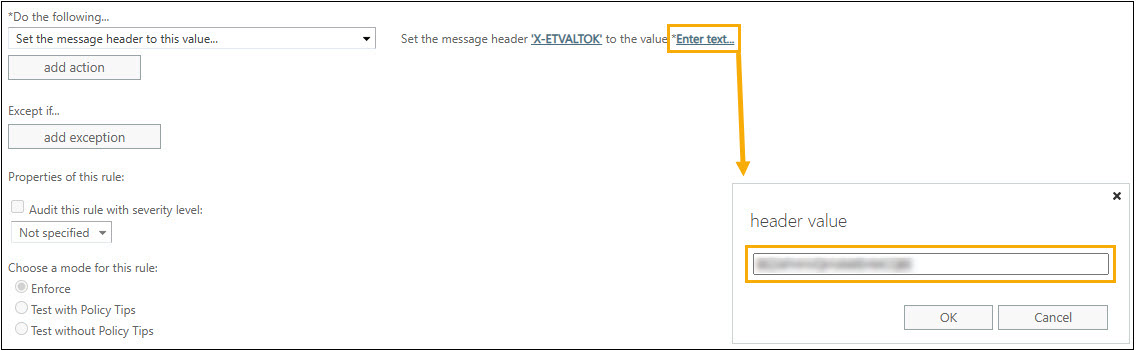
Select Enter text... beside Set the message header and enter X-ETVALTOK, and then select OK.
Beside to the value, select Enter text..., and enter the unique value for the account. You can retrieve the value for your account in the EncryptTitan portal by going to Configurations > Domain setup and select the domain you are setting up. Select Outbound servers, and in the window that appears select Microsoft 365. Copy the custom x-header value by clicking the copy
 icon.
icon.
Paste this value, which is typically 20 characters, into the header value field, and select OK.
Ensure Enforce is enabled. The other settings can be left at the default values.
Select Save to save the rule.