Selecting a Policy to Assign to New Devices
Before installation, you can edit the global device configuration settings in WebTitan to specify a policy that is assigned to new OTG 2 installations. This is useful if you want to apply a particular policy you have created to a set of users, such as students or teachers.
Note
At the point of OTG 2 installation, the policy that is currently specified in Settings > Device Configuration > Policy is the policy that is used for the installation.
Example: You are rolling WebTitan OTG 2 out to students and teachers and want to apply a different policy to each group.
In this case, change the policy in the global device configuration to your student policy, e.g. OTG-student-policy, and then carry out the installation for your students. Once installation is complete and you have verified the users (students) have been added to WebTitan, change the policy in the global device configuration to your teacher policy, e.g. OTG-teacher-policy, and carry out the installation for your teaching staff.
Follow these steps to select a policy to assign to new devices:
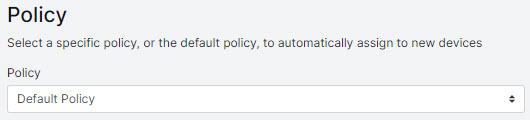
Go to Settings > Device Configuration > Policy.
By default, Default Policy is selected. If this option is selected, one of the following options applies, depending on the parameters used during installation:
If OTG 2 is installed using default parameters only, the installation creates a virtual location. This virtual location will get the default policy applied if Default Policy is selected.
If OTG 2 is installed using the LOCATION_NAME parameter, where the location does not already exist in WebTitan and is created during install using the LOCATION_NAME parameter, the virtual location is created and the default policy is applied to that virtual location.
If OTG 2 is installed using the LOCATION_NAME parameter, where the location already exists in WebTitan, then the "Policy" feature does not apply. If the virtual location has a policy set, this is the policy applied.
To select a different policy from the default, choose that policy from the Policy: drop-down menu. The menu shows policies that have already been created in Content Filtering > Policies. See Create a Custom Policy.
Click Save to save your selection.
Caution
The policy you select and save is the policy assigned to all new WebTitan OTG 2 installations until you change it again, or revert to the default policy.