Add a Custom Role Assignment
Custom roles are used to strengthen DNS Proxy application access rather than solely using Azure's built-in permissions. Follow the steps below to add a custom role assignment.
Go to your Microsoft Azure Portal
 .
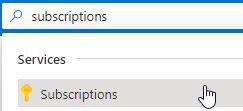
.In the top search bar, type subscriptions and select Subscriptions from the results.
Click on your subscription name and the Subscription page opens.
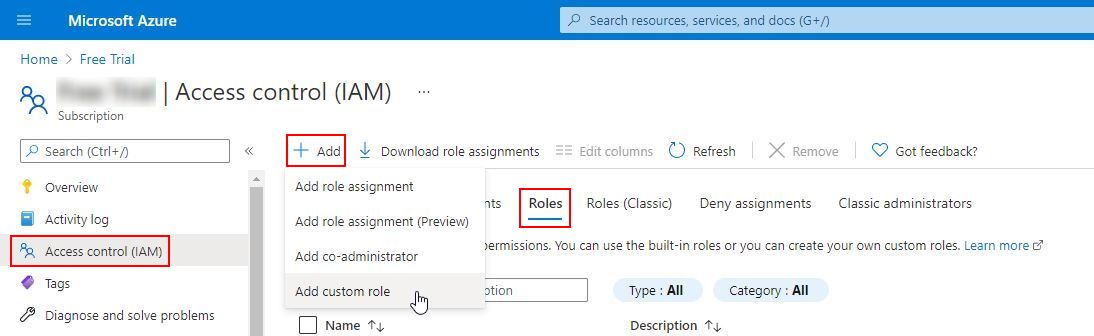
Select Access control (IAM) from the left-hand menu.
Click the Roles tab.
Click
 Add and select Add custom role from the drop-down menu.
On the Create a custom role page, click the JSON tab, and then click Edit.
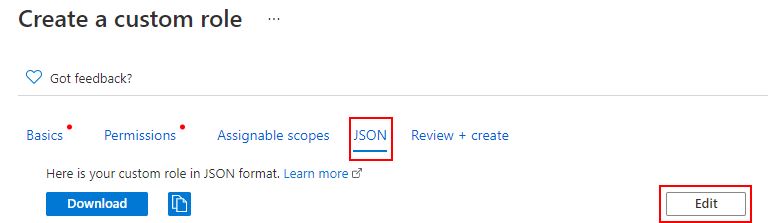
Copy the following JSON and paste it into the text box, overwriting the existing JSON text
{
    "properties": {
        "roleName": "AzureADAgent Resource Reader",
        "description": "Read ResourceGroups, Virtual Machine & Network Interface Data",
        "assignableScopes": [
            "/subscriptions/3f51630f-4c88-4fba-b57a-5c39b5662a2f"
        ],
        "permissions": [
            {
                "actions": [
                    "Microsoft.Network/virtualNetworks/read",
                    "Microsoft.Network/networkInterfaces/read",
                    "Microsoft.Network/networkInterfaces/diagnosticIdentity/read",
                    "Microsoft.Compute/virtualMachineScaleSets/virtualMachines/networkInterfaces/read",
                    "Microsoft.Compute/virtualMachines/read",
                    "Microsoft.Compute/virtualMachines/instanceView/read",
                    "Microsoft.Compute/virtualMachineScaleSets/virtualMachines/read",
                    "Microsoft.Resources/subscriptions/resourceGroups/read"
                ],
                "notActions": [],
                "dataActions": [],
                "notDataActions": []
            }
        ]
    }
}
Click Next.
Click Create and you have now created a custom role named AzureADAgent Resource Reader.
Note
It can take a number of minutes for a custom role to propagate throughout the tenant.
Return to the Subscriptions page and select Access control (IAM) in the left-hand menu.
Click the Roles tab and in the search bar and enter AzureADAgent Resource Reader.
On the Subscriptions page, select Access control (IAM) in the left-hand menu and click Add Role Assignment. The Add role assignment window displays:
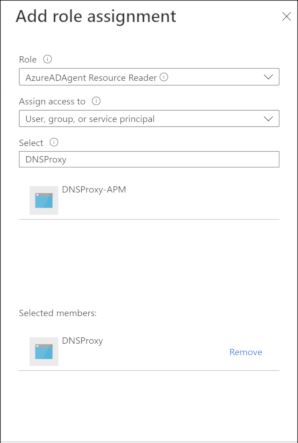
From the Role menu, select AzureAD Agent Resource Reader.
From the Assign access to menu, select User, group, or service principal.
From the Select menu, select DNSProxy.
Click Save.