Adding your Customers
Watch this short video for an overview, or follow the steps below for more detail on adding a customer to WebTitan.
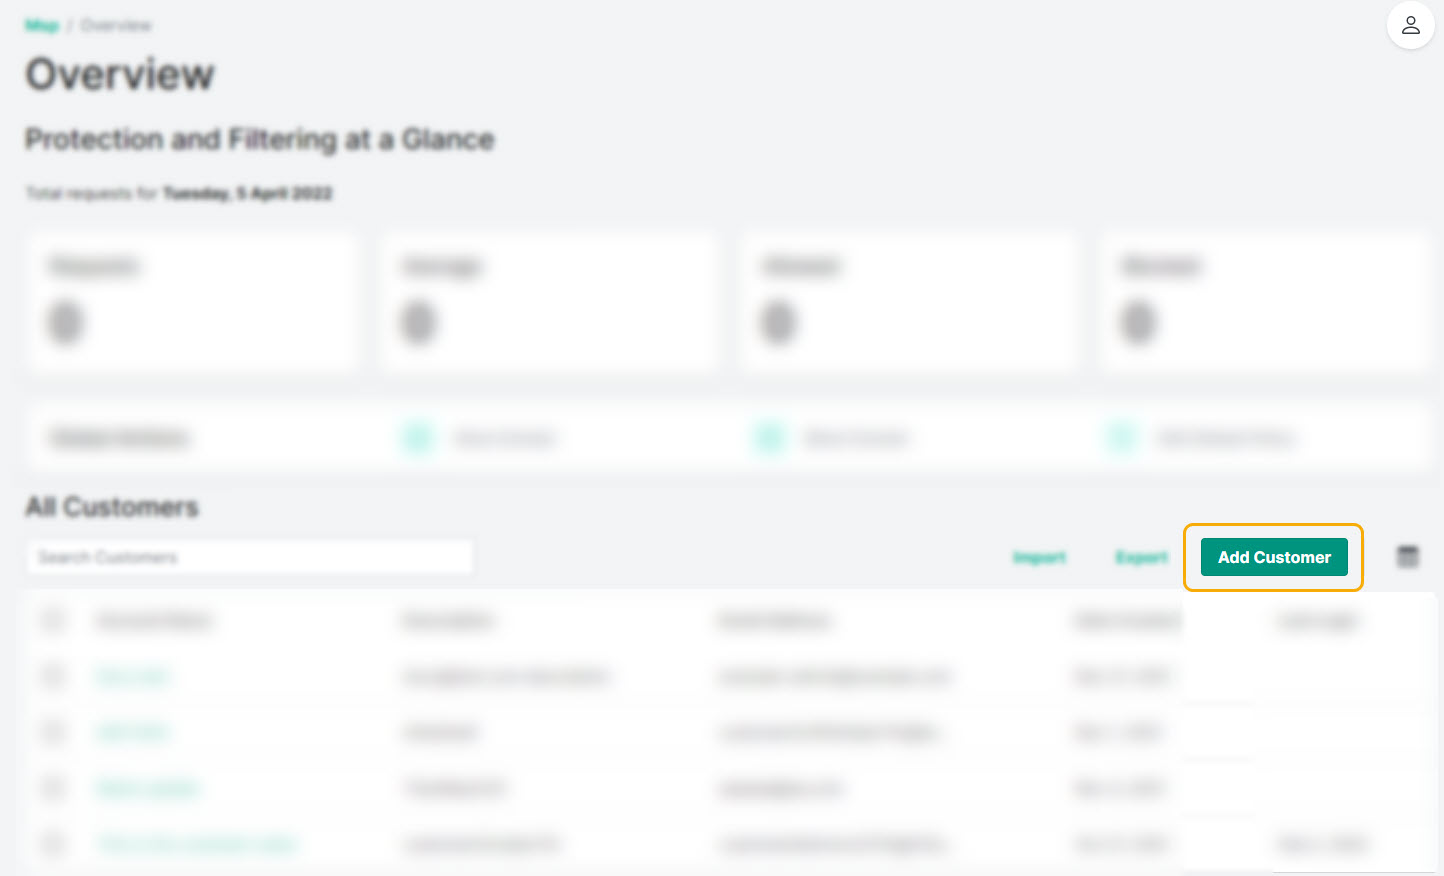
Go to Overview and select Add Customer.
Enter details for this customer:
Account Name: Name of your customer's business. For example, Example Coffee Company.
Customer accounts are listed alphabetically in the Customers menu. If you are managing many accounts, consider a naming convention to group customers that makes sense for your business.
Email: Email address associated with this customer account, for example, admin@example-coffee-company.com. This is the email address a customer admin uses to log into their WebTitan account.
Description: A brief description of this customer account. This is a useful field for filtering and searching.
Password: This is the temporary password a customer admin uses to log into their WebTitan account (minimum of eight characters; must contain a letter and a number or symbol).
Tip
This password is not visible in the UI once the customer account is added.
License: A license string you can assign to this customer for your own reference, for example, customer reference number. This is not your WebTitan license.
License Count: An optional number you can enter for this customer to record the license count purchased.
Timezone: The time zone associated with this customer. Using the correct time timezone ensures that Overview information is accurate.
Content Category Protection Level: Select a content filtering level to apply to this customer: Essential, Enhanced, Optimum or Custom.
See Category Descriptions for a description of each category.
The level selected is applied to the customer's default policy.
Level
Categories Blocked
Essential
Anonymizer, Compromised, Criminal Skills/Hacking, Hate Speech, Phishing/Fraud, Spam, Spyware and Malicious Sites.
Enhanced
Anonymizer, Compromised, Criminal Skills/Hacking, Download Sites, Hate Speech, Illegal Drugs, Online Ads, Phishing/Fraud, Pornography/Sex, Spam, Spyware and Malicious Sites, Violence.
Optimum
Alcohol, Anonymizer, Compromised, Criminal Skills/Hacking, Dating, Download Sites, Gambling, Hate Speech, Illegal Drugs, Nudity, Online Ads, Phishing/Fraud, Pornography/Sex, Spam, Spyware and Malicious Sites, Violence, Weapons.
Custom
You can create a custom protection level in your Global Default Policy that allows or blocks access to selected categories.
The Custom option is available when adding a customer if Custom is selected as your content filtering level from Settings > Global Default Policy.
Select Add Customer to save this customer or Cancel to close the window and discard changes.
Customer Setup
After a customer account is added to WebTitan, further setup steps must be completed to allow a customer to begin filtering their web traffic. This can be done by:
MSP Admin: From the side-bar menu, select the customer and drill down to the customer-level view. Follow the steps in WebTitan Customer Setup.
Customer Admin: Once a customer is added to WebTitan, a Customer Admin can log in at the customer level and follow the steps in WebTitan Customer Setup.
Customer account credentials are input by an MSP Admin when a customer account is created. See Adding your Customers.
A customer password can be reset as necessary. See Resetting a Customer Password.