Troubleshooting Dynamic IP Agent
If you experience an issue with the Dynamic IP Agent, take a look at the information below to assist with troubleshooting.
Verifying the Dynamic IP Agent is Running
Follow the steps below to verify that the WebTitan Dynamic IP Agent is installed and running on your machine.
Note
If Dynamic IP Agent is installed on a laptop, a restart is required to complete the installation.
Open Windows Task Scheduler.
From the Active Tasks pane, look for wt_ipagent (the Dynamic IP Agent task).
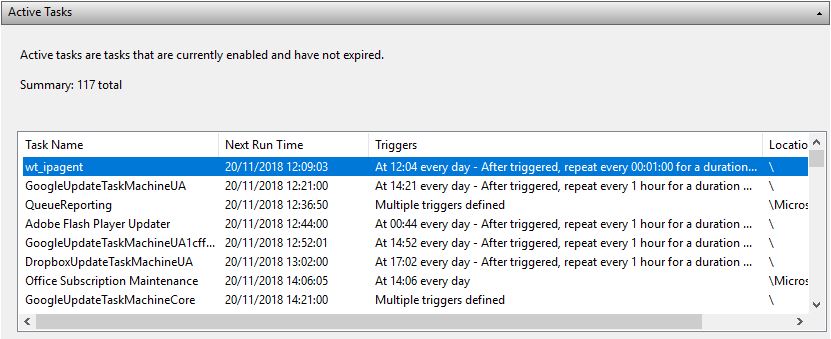
Double-click on wt_ipagent to view further details. Select the History tab to view the task's activity.
If the History tab does not display results, select Enable All Tasks History from the Actions menu.

If the task is not listed, further troubleshooting is required.
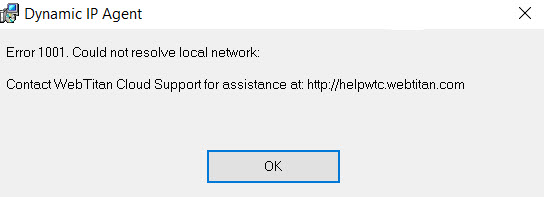
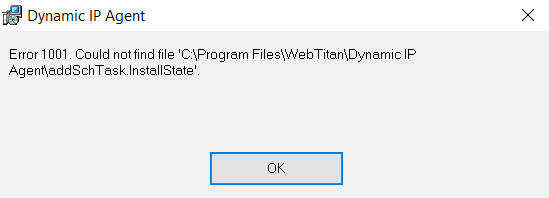
Installation Error Messages
If the installation of the Dynamic IP Agent fails with either of the error messages below, please check you have entered the correct Location Key and/or WebTitan FQDN/IP during installation:
Locating Dynamic IP Agent Logs
To assist with troubleshooting, you can access the log file from C:\ProgramData\WebTitan\WebTitan Cloud Locator\.
Updating Dynamic IP Agent with a new Location Key
If you make changes to the Dynamic IP Location settings in WebTitan, a new location key is generated. To ensure the Dynamic IP Agent continues to update WebTitan as your IP changes, follow the steps below to update the agent with the new location key:
In WebTitan, go to Settings > Locations > Dynamic IP.
Double click on your Location Key and copy it to the clipboard.
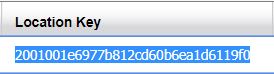
Locate the Dynamic IP agent config file config.ini, usually located in
C:\ProgramData\WebTitan\WebTitan Cloud Locator\.Open config.ini and replace the existing key with the new key:
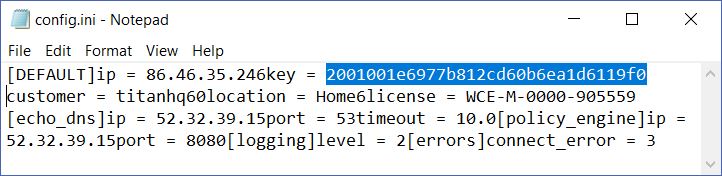
Save and close config.ini.