Create a Custom Policy
Policies include several settings but mainly determine what categories of a website a user can access and the entries to your allow and block lists. A default policy is assigned to your account when your account is created and this is automatically assigned to all new locations, devices, and users. However, you can also create your own custom policies.
Once created, a custom policy can be assigned to any location, device or user.
Note
Create a custom policy by giving basic details (policy name, description and content filtering level). Then edit the custom policy to configure settings such as custom filtering levels and allow and block lists. See Edit a Custom Policy.
Watch this short video for an overview, or follow the steps below to create a custom policy.
Go to Content Filtering > Policies and select Create Policy.
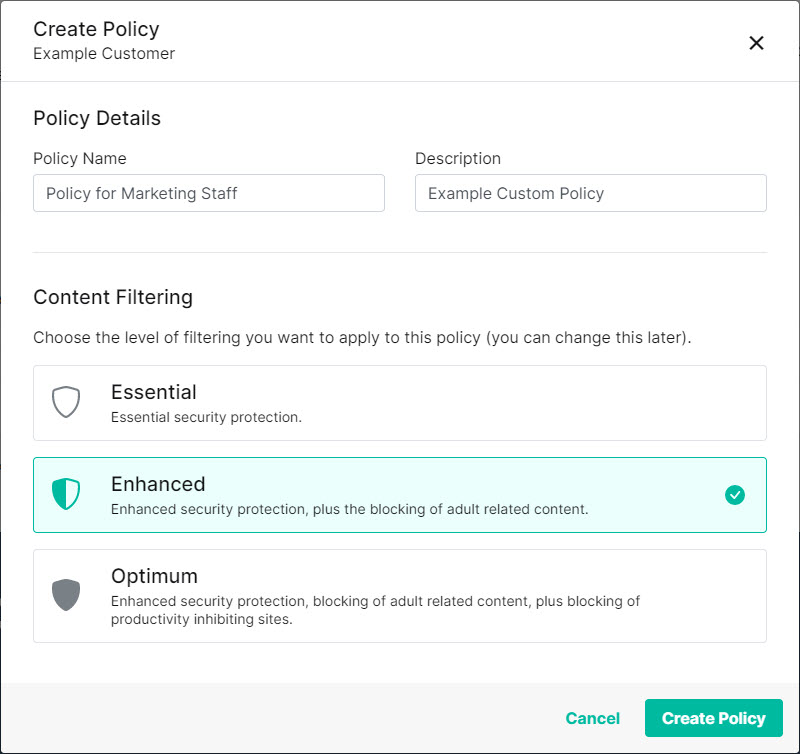
Policy Details:
Policy Name: Enter a name for this custom policy. For example, Policy for Marketing Staff.
Description: Enter a brief description of this custom policy.
Content Filtering:
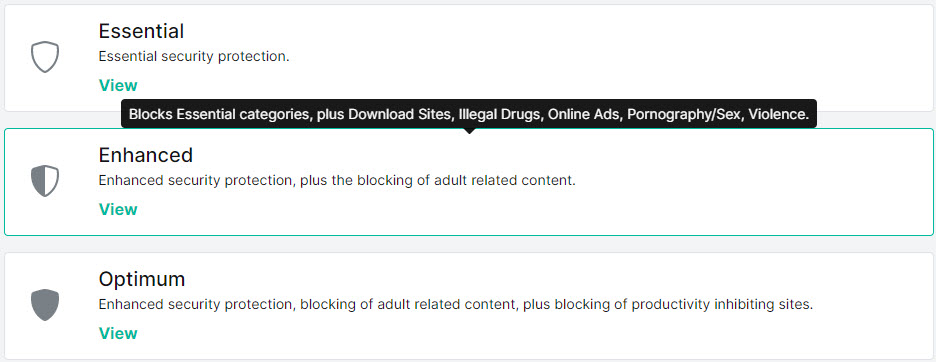
Policies are configured to allow or block access to particular categories. A category is a list of websites that are grouped together based on their dominant content, for example, Education, Alcohol, or Finance.
See Category Descriptions for a description of each category.
A custom policy allows you to select one of three predefined content filtering levels (category groupings) at this stage: Essential, Enhanced or Optimum. Once a custom policy is created, you can edit it to apply a custom level that includes your own selected categories.
See Content Filtering Level Descriptions for a description of each level.
Select Create Policy.
Once created, you can edit the custom policy to configure settings such as custom filtering levels and allow and block lists. See Edit a Custom Policy.