Administrators
Go to Settings > Administrators to view and manage WebTitan administrators.
Use the search
 box to search the list of administrators.
Select Export to export all administrators as a .csv file.
Click the column
 icon to display the table column names. Slide each on and off to view or hide a column.
To delete an administrator, select the box
 beside the administrator (or administrators) and select Delete.
Columns can be sorted in ascending or descending order using the
 or
or  icons beside the column name. Data is sorted A-Z or Z-A by uppercase first and then lower case.
The following information is available for each administrator:
Full Name: Administrator name.
Email: Email address for administrator.
Description: Optional description for an administrator.
2FA: Indicates if Two-Factor Authentication (2FA) is enabled (On) or disabled (Off) for the administrator.
Last Login: Date on which administrator last logged in.
Last Login IP: Administrator's IP Address when last logged in.
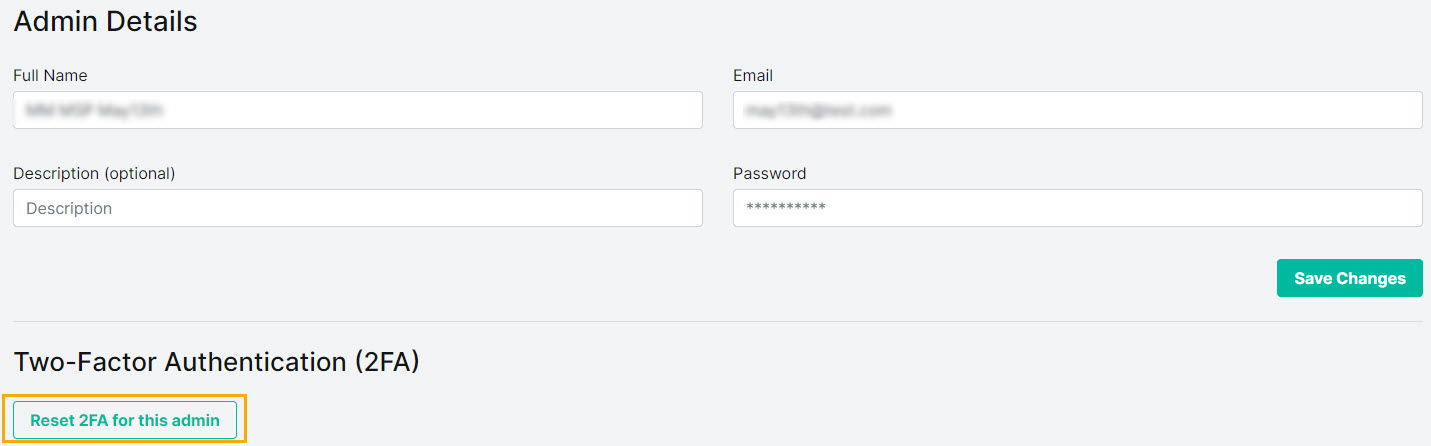
Editing Administrator Details
Click on an administrator to view the Admin Details page and edit name, email, description and password. You can also reset an admin's Two-Factor Authentication (2FA) if, for example, an admin does not have access to their phone or their recovery codes.
Go to Settings > Administrators and select the administrator whose details you want to edit.
In the Admin Details page, you can edit the following:
Full Name: Enter the name of this administrator.
Email: Enter an email address for this administrator.
Description: Enter an optional description.
Password: Enter a password for this administrator.
Select Save Changes.
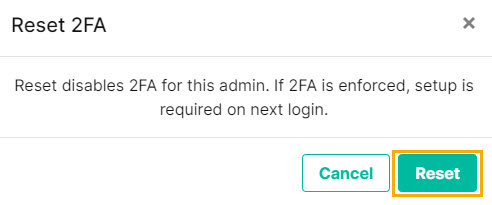
If you want to reset 2FA for this administrator, select Reset 2FA for this admin.
Note
When you reset 2FA for an admin, the admin will need to take the following action, depending on whether 2FA is enforced:
If 2FA is enforced for the admin: In this event, the admin will be required to set up 2FA the next time they log in, so that they can access the system.
If 2FA is not enforced: The admin can set up 2FA by going to their Profile menu and selecting Security.
In the window that opens, select Reset.