Adding a Dynamic DNS Location
Dynamic DNS can be used as an alternative to Dynamic IP to achieve the same result. With dynamic DNS, when the IP address associated with your dynamic DNS hostname changes, WebTitan automatically discovers this change and updates the location IP address.
To use dynamic DNS, you must first ensure this service is supported on your network. Many routers and other network appliances already have dynamic DNS functionality built in (refer to your appliances documentation for more information). You will also need to sign up with a dynamic DNS host provider who can issue you with a hostname and provide any software to be installed on your network.
Once you have dynamic DNS in place, follow the steps below to add a Dynamic DNS location:
Go to Environment > Locations and click Add.
Select Dynamic DNS and the Add Location (Dynamic DNS) window displays:
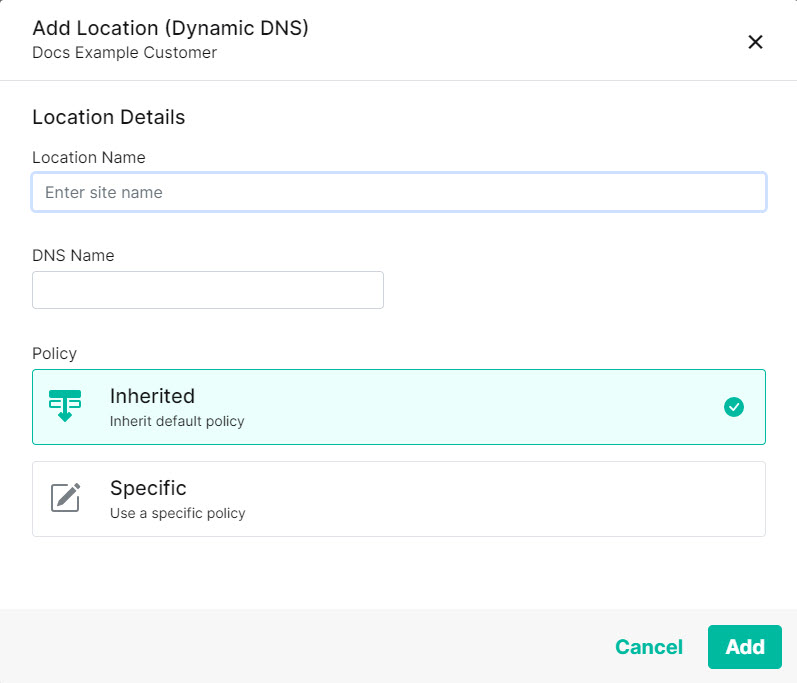
Enter details for this Dynamic DNS Location:
Location Name: Give this location a name. For example, Main Office.
DNS Name: Enter your DNS name. For example, www.example.com.
Policy: Select Inherited or Specific:
Inherited: Select this option to apply a policy in order of precedence. See Order of Precedence for Policies.
Specific: Select this option to choose a custom policy already created in Content Filtering > Policies.
Note
If a user of this location can be identified, then any specific group or user policy will take priority over the location policy.
Click Save.