Configure Azure VNet to use DNS Proxy
Once you have configured the WebTitan Azure AD Enterprise App on DNS Proxy, you must configure Azure VNet to use the DNS Proxy.
Go to your Microsoft Azure Portal
 .
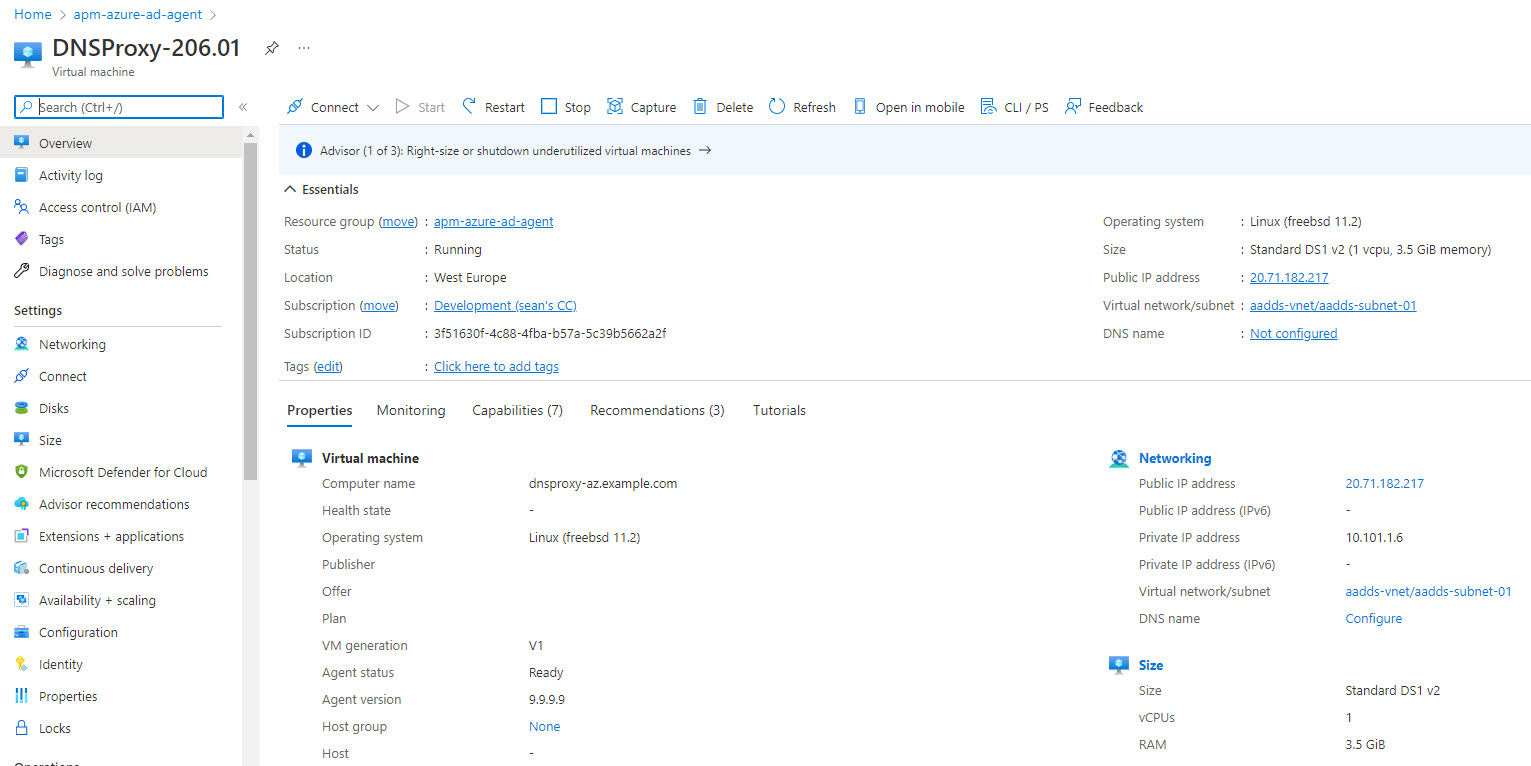
.Select Virtual Machines, and on the Virtual Machines page that opens, select the VM that you want to configure Azure VNet on.
In the Networking section, take note of the VM Private IP Address and then click the Virtual network/subnet link.
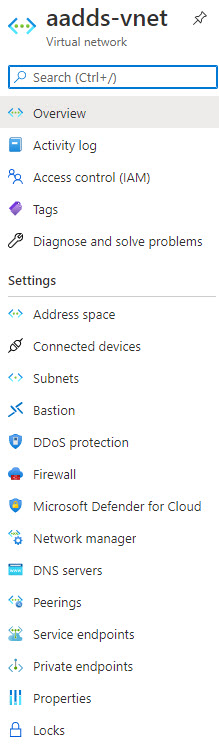
Select DNS servers from the left-hand menu.
On the DNS Servers page, select Custom and add the IP Address from step 1. Click Save.
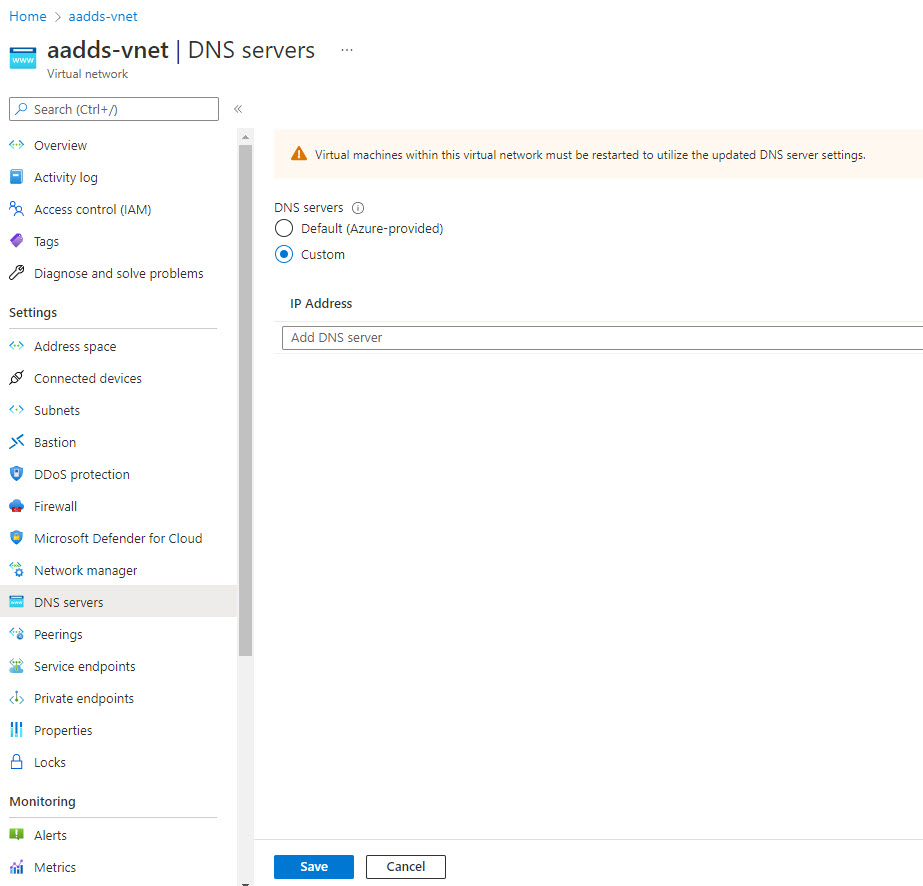
Restart the DNS Proxy immediately.
Note
VMs must be restarted immediately in order to use the DNS Proxy for processing DNS requests. Otherwise, the previous DNS settings will be used.