Make the Azure App Available on the Target Tenant
Follow the steps below to make the app available on the target tenant:
Go to your Microsoft Azure Portal > Azure Active Directory. This link will take you directly there: https://portal.azure.com/#blade/Microsoft_AAD_IAM/ActiveDirectoryMenuBlade/Overview
 .
.Copy your Tenant ID from the Tenant information panel:
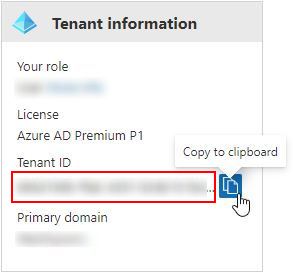
Replace [TENANT-ID] in the URL below with your Tenant ID copied in Step 2 above.
https://login.microsoftonline.com/[TENANT-ID]/oauth2/authorize?client_id=a248315f-7d19-41c2-8acb-2619857956c9&response_type=code&redirect_uri=https%3A%2F%2Fwww.microsoft.com%2F
Open a new browser tab, paste the modified URL from the previous step and navigate to the page.
If the following Permissions requested window displays, check Consent on behalf of your organization and click Accept. You may be redirected to a generic Microsoft page that you can close.
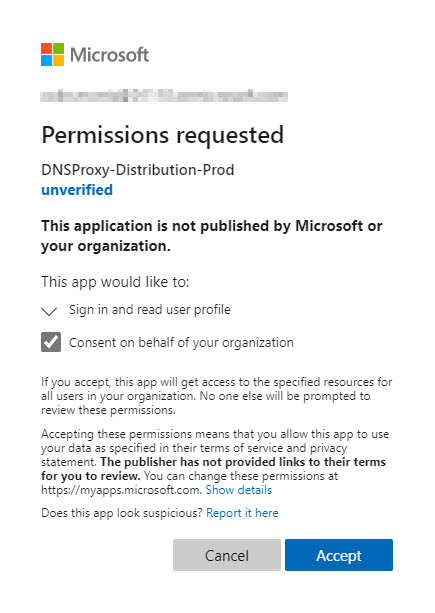
Important
This makes the DNSProxy-Distribution-Prod app available to your tenant.
From the portal menu in the top left, select Resource groups and navigate to the resource group into which you want to launch DNS Proxy.
Open the Role assignments tab and click Add role assignment.
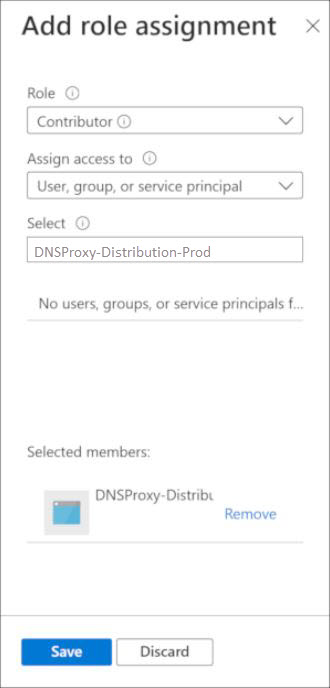
From the Role menu, select Contributor.
From the Assign access to menu, select User, group or service principal.
From the Select menu, select DNSProxy-Distribution-Prod.
Click Save.
Click Save.