Configuring Link Lock
Important
Link Lock is enabled or disabled at the Customer level (default: enabled).
Link Lock settings are also edited and managed at the Customer level.
Settings are not inherited from the MSP level.
Follow the steps below to configure Link Lock.
Go to Configuration > Link Lock at the customer level.
Select the Policy Configuration tab to configure your settings:
Follow redirection links: Select Yes to allow Link Lock to follow redirected URLs (up to a maximum of five). This protects against a legitimate URL redirecting to a malicious URL.
Note
Selecting this option may affect system performance.
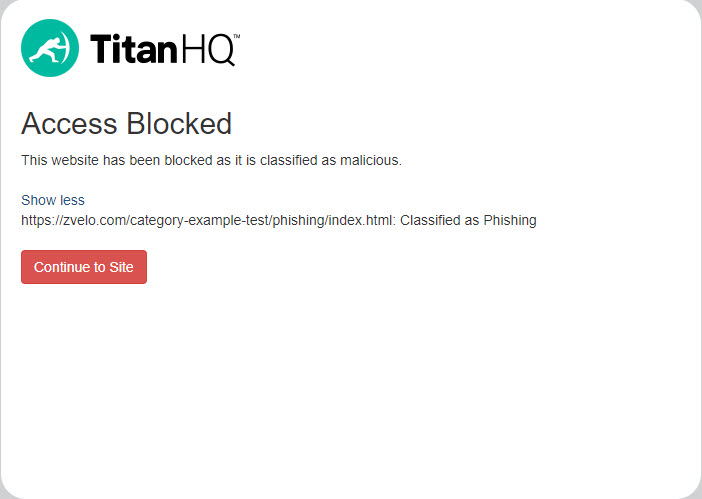
Display a button on the block page allowing a user to continue to the blocked site: Allows a user to continue to a blocked URL from the block page.
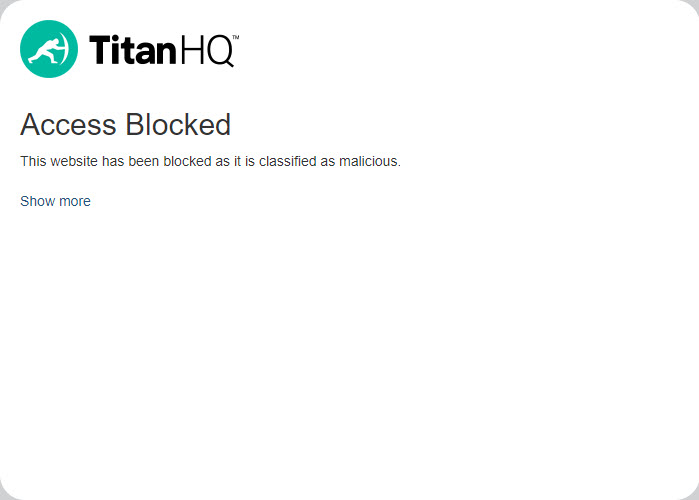
Display default logo on the block page: Displays the image currently being used on the Link Lock block page. Default:
Use custom logo on the block page: When you select Yes, you'll be given the option to Choose File and upload a custom block page image. The following file formats are supported: PNG, JPG and JPEG. Maximum file size is 2048 KB.
Edit text on the block page: Select Yes to add a custom block page heading and/or message.
Select Save Changes.
Link Lock Block Page Examples
Below are examples of a Link Lock block page using the default logo, header, and message. These settings can be customized for your domain using the settings described above.
 |  |