
Creating a Phishing Campaign
Follow the steps below to schedule phishing campaigns that use system-recommended lures. The campaigns you create will automatically send simulated phishing emails of different complexities to the users you select. A lure is sent to each active user at a random time once every two week period for the duration of the campaign.
Note
Security Awareness Training for any users who click on a lure is automatically enabled when you create a phishing campaign. This means that users who click on a lure will receive an email notifying them that they've been assigned training. They'll receive a link to one of several training modules, such as Email Security or Data Protection.
You can create a phishing campaign from either the Phishing Simulation > Overview page or Phishing Simulation > Phishing Campaigns. Select Create Campaign.
As you create a phishing campaign, a Summary panel on the right automatically updates the information. The following information is shown:
Name: Name of the phishing campaign.
Campaign Duration: Length of time campaign will run.
Campaign Dates: Dates when your campaign begins sending lures and when it finishes.
Email Results: Notification that campaign results will be emailed to MSP admins each month.
Auto Enroll: Notification that new users who join after the campaign start date will be automatically added to the campaign. Additionally, users are automatically enrolled in security awareness training if they click a lure.
Email Manager: Notification that manager will be emailed if user clicks a lure. If a user repeatedly interacts with the same lure, the manager only receives an email the first time a user clicks a lure.
Stealth Mode: Indicates if stealth mode is enabled. If enabled, users won't know that they've been enrolled in an active phishing campaign, and they won't receive reactive training.
Users Enrolled: Indicates if all users have been enrolled in the campaign. If specific users are selected, then their names are listed.
You can select the collapse
 icon to close the Summary panel. Click it again to open it.
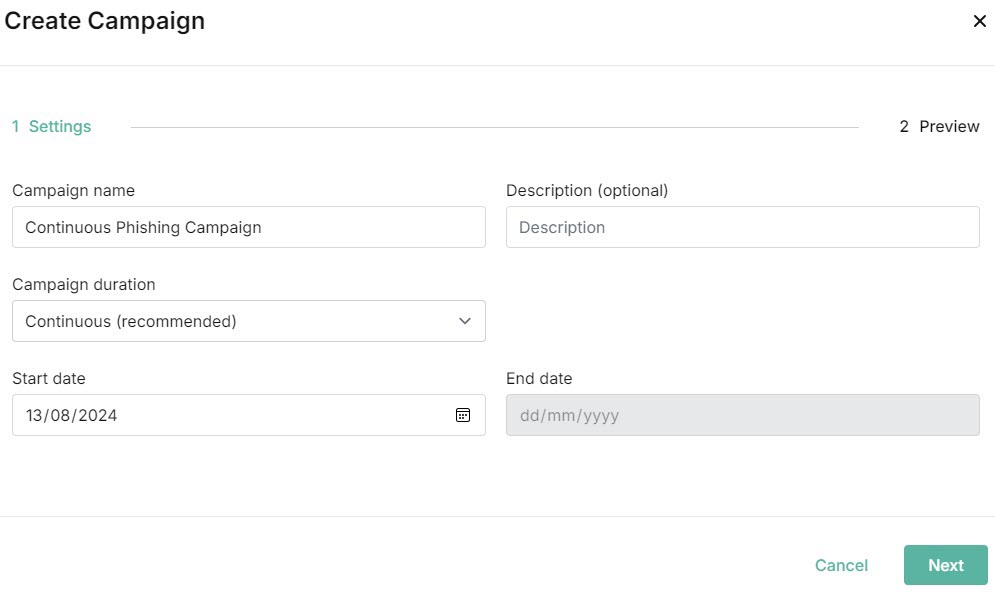
Enter the following details:
Campaign Name: The name of your phishing campaign. A default name is given, which you can overwrite using a maximum of 30 characters.
Campaign duration: From the dropdown menu, select the length of time you want your phishing campaign to run. Different lures will be sent randomly to your customers' active users, once every two weeks.
Options include:
Continuous (recommended): This is the default option, which begins on the start date you enter, and has no end date.
1, 3, 6 or 12 months: Alternatively, you can select campaign durations of 1, 3, 6, or 12 months.
Start Date: Date on which your phishing campaign begins sending lures. By default, today's date is automatically entered. To change this, you can enter the date or select the calendar
 icon to select a different start date.
Note
If you select today's date as a start date, then lures are scheduled to send from today.
End date: The end date is automatically prepopulated based on the campaign duration you selected. If you selected a Continuous campaign, then the end date is not applicable.
Description (optional): Short summary of the campaign.
Turn on stealth mode: When you enable stealth mode, users won't know that they've been enrolled in an active phishing campaign. If they click on a lure, they won't be notified and they won't receive reactive training.
Depending on whether you selected to Create Campaign from either the Overview or Phishing Campaigns page, you can select either Back to Overview or Back to Campaigns at any stage during the campaign creation process to return to that page. You'll be alerted by a confirmation message that you have unsaved changes.
Select Next.
Here you can select the users you want to enroll in the phishing campaign. The default option is All Users.
Note
If a customer account has just been connected to Microsoft 365, synchronization with the Platform can take up to two hours. Once synchronization takes place, users associated with the customer account can be added to a phishing campaign.
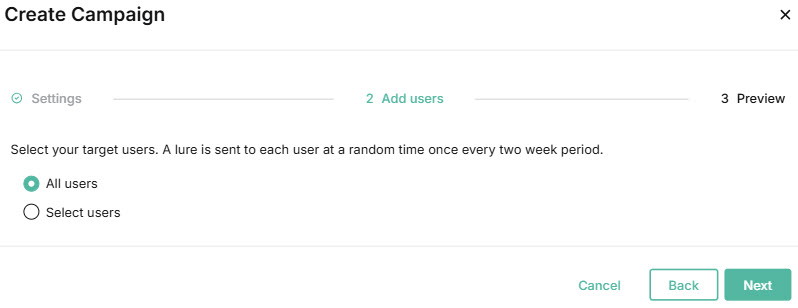
If you want to select specific users, choose Select users, and a list of your users will appear.

You can manage how the table is displayed as follows:
Use the Search
 box to search a name, job title, email, manager, or department. Note that the email column is not displayed by default. Select the column icon
  to manage how table columns are displayed:
Select or deselect the checkbox beside a column name to show or hide a column.
Use the reordering
 icon to move columns up and down the list. This changes the left-to-right display. An item at the top of the list, for example, means that it will be the first column on the left. Select Reset Order to restore the columns to their default positions.
Resize columns by hovering your cursor over the column boundary you want to adjust until it becomes a resize
 cursor. Drag the boundary until the column is the width you want.
Select the up/down
 arrows in the column headers to sort column content.
The Users Enrolled list in the Campaign Summary panel will update as you select or deselect users.
Check the Summary panel to ensure you're satisfied with the phishing campaign you're about to create. If you want to modify any of your selections, select Back.
Select Create Campaign. The new campaign will appear in your Phishing Campaigns table in Phishing Simulation > Phishing Campaigns. See Managing Phishing Campaigns for additional details.