MSP Administrators
Multiple roles are available for administrators, and depending on the role that is assigned, the privileges and restrictions vary. If your role restricts you from performing an action in the UI, then the menu or action item won't be available to you. It will be visible but faded, and will show a blocked icon on rollover, meaning your role cannot access it.
The following admin roles exist:
Super Administrator: Has full access to all settings and data. The Super Admin can perform all tasks at the MSP and customer levels.
Administrator: Can perform all tasks at the customer level and most tasks on the MSP level, except manage other admins or edit SSO (Single Sign-On) settings.
Read-only Administrator: Can view MSP and customer levels, but cannot add, edit or delete settings or data.
Go to Settings > Administrators to view and manage administrators.
Use the search
 box to search the list of administrators.
Select the column
 icon to display the table column names. Select or deselect a checkbox to view or hide a column.
To delete an administrator, select the box
 beside the administrator (or administrators) and select Delete.
The following information is available for each administrator:
Full Name: Administrator's first and last name.
Email: Email address for administrator.
Role: Role assigned to administrator.
Last Login: Time period when the account was last accessed. Hover your mouse over the time period to see the exact date and time.
Editing Administrator Details
Select the edit  icon under the Actions column to edit an administrator's details. When you're finished, select Save Changes.
Add an MSP Administrator
Go to Settings > Administrators and select Add. The Add Administrator window displays:
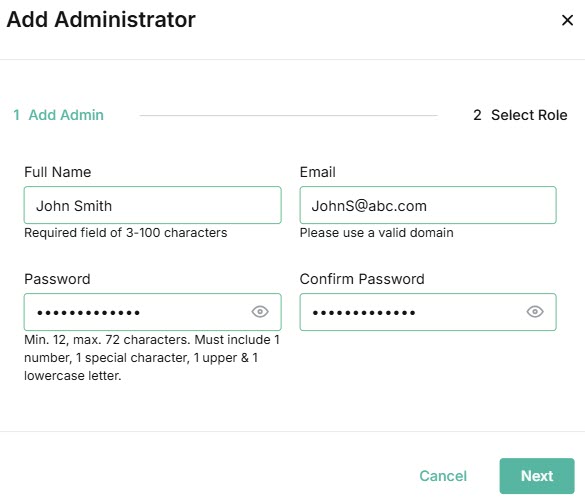
Enter the following details:
Full Name: Enter the first and last name of this administrator.
Email: Enter an email address for this administrator.
Warning
The same email address cannot be used for an MSP admin and a Customer admin.
Password: Enter a password for this administrator. Passwords must be a minimum of 12 characters (max. 72) and include one lower case character, one upper case character, a number and a special character. Select the password icon to display the password and ensure you enter the same password in both fields.

Confirm Password: Confirm the password entered in the Password field.
Select Next.
Select a role for the administrator you're creating.
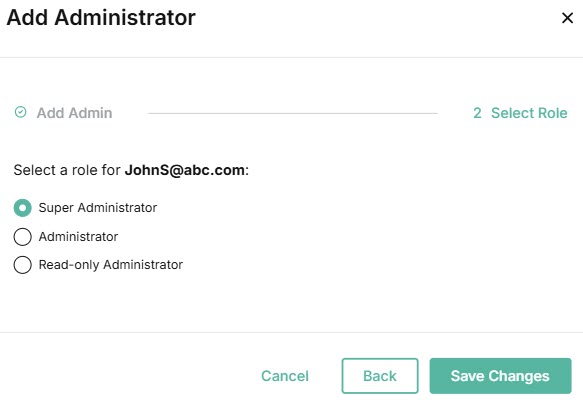
Super Administrator: Has full access to all settings and data. The Super Admin can perform all tasks at the MSP and customer levels.
Administrator: Can perform all tasks at the customer level and most tasks on the MSP level, except manage other admins or edit SSO (Single Sign-On) settings.
Read-only Administrator: Can view MSP and customer levels, but cannot add, edit or delete settings or data.
Select Save Changes.